WP Engine supports many developer workflows within our hosting environment. In this article we will explain the recommended workflow for developers who specifically do not use a version control system. If you use a version control system like git to manage changes to your site, please use our best practices guide for version control instead.
Best Practices
A common concept in development is: “Databases move down, code moves up.” Within this concept the understanding is that “up” refers to moving from development towards production, your live production site being the “top.” Similarly, “down” refers moving from production towards your development environments. The “bottom” point may vary depending on the different roles and number of environments you utilize for each project.

The reason this concept works is that it is based on the understanding that your site’s database is in a constant state of flux. There are new articles being published, new orders received, new users registered, and other actions happening daily on the site. By never copying your databases “up” towards production, you do not run the risk of overwriting newer data.
Get Organized
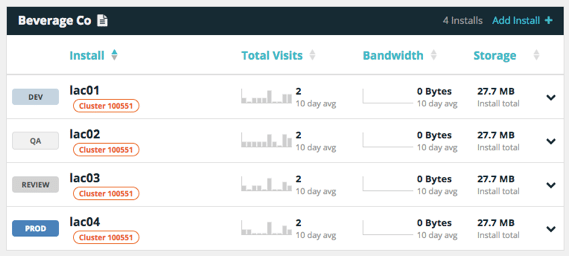
When working on multiple copies of the same site, it’s best practice to group these copies together into a “Workspace.” The Workspaces allow you to organize these copies visually together. Each copy can also be labeled with a specific role, using “Environment labels.” In this way it becomes easy to visually differentiate between the instances in each group. In the example below, I have four instances within my “Beverage Co” Workspace: Dev, QA, Review, and Prod.
Deploy
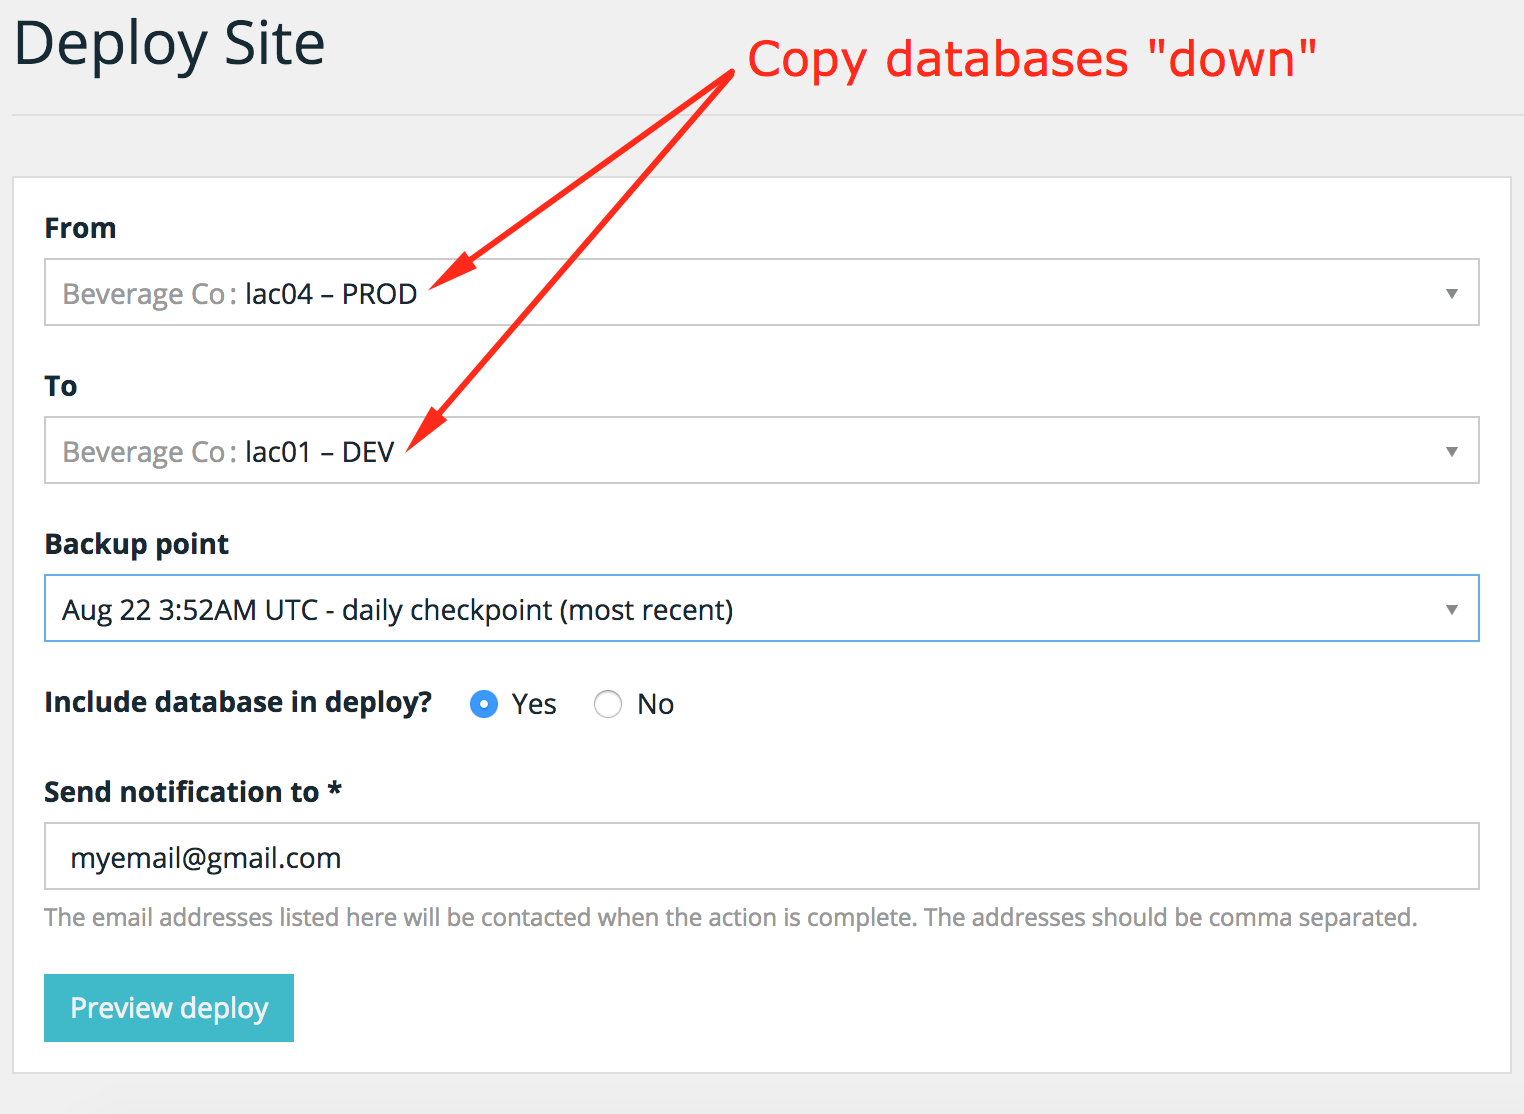
Now that your instances are labeled and organized, use the “Deploy site” tool to copy your instances “down” in your workflow. This method will copy all files and the database (when “Yes” is checked) to the instance selected in the “To” dropdown menu.
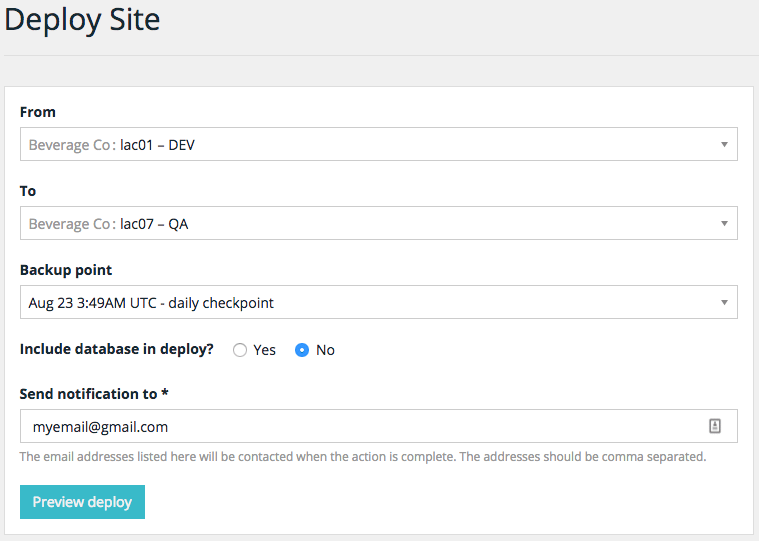
Make your desired changes in your development instance. Best practice is to ensure these changes are made only to site code. Then, when deploying your site “up” using the Deploy site tool, make sure “Include database in deploy” is set to “No.” This will ensure you don’t overwrite production data when deploying to your live Prod environment.
Remember: When using the “Deploy site” tool, a backup of the destination environment is made in the process. If you notice data that was unintentionally changed or overwritten in this process, simply use the Restore option.
Not recommended: Copying databases “up”
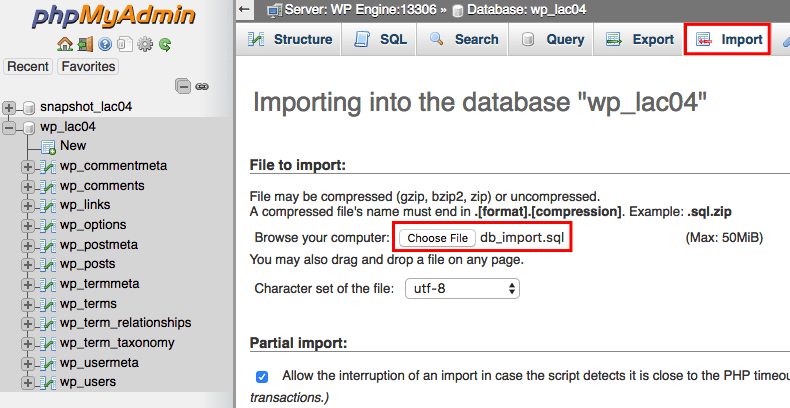
There are sometimes circumstances where changes you make on your development instances involve both code and database changes. In these specific cases, you can still deploy your code changes “up.” However, you will also need to download an export of the specific tables you wish to import to your production environment using phpMyAdmin. Most commonly, you will want to specifically export the wp_options table, as well as any other tables specific to the changes you made in development. Did you add a plugin that added database tables? Be sure to export these tables.
In general you should avoid exporting the following tables:
- wp_posts
- wp_postmeta
- wp_comments
- wp_commentmeta
- wp_users
- wp_usermeta
- wp_terms
- wp_term_relationships
- wp_term_taxonomies
- Any woocommerce-related tables
In your downloaded export, locate the “siteurl” and “home” fields in the wp_options table and make sure they are updated to the URL of your production site.

Then, import the database export file to your production site using phpMyAdmin.
Please note: While the Deploy site tool does offer the option to copy your site’s files and database “upstream” in your Workspace, the “Copy databases down, Copy code up” method is still highly recommended. Copying the site “up” including the database should only be done when you are launching an entirely new site.