OVERVIEW
By this point of the migration process you will have the website database imported and wp-content folder uploaded to WP Engine. The website may not appear to be up yet because it’s still configured with your domain name (ex: domain.com) instead of the temporary one we issue (ex: [yourwebsitename].wpengine.com) In the next steps we will bring up the website by updating the website URL in your database.
ACCESS PHPMYADMIN
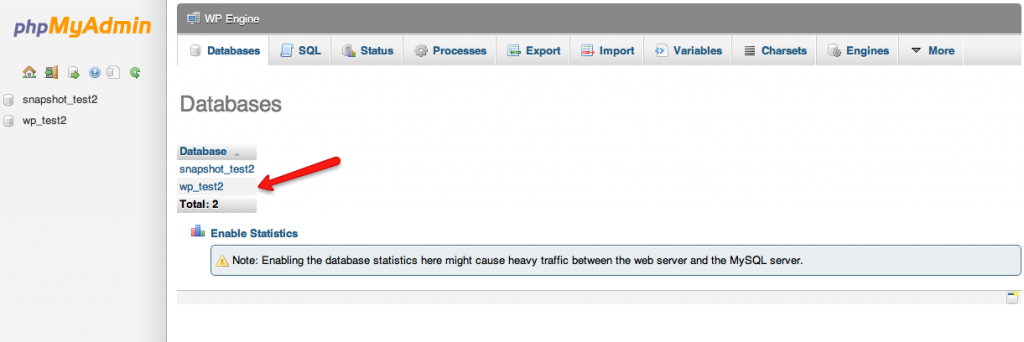
Access phpMyAdmin to edit the database. For assistance on accessing the phpMyAdmin, refere to the document, “How to Access phpMyAdmin.” Click on the database without the “snapshot” in its name.
SELECT ‘WP_OPTIONS’ TABLE
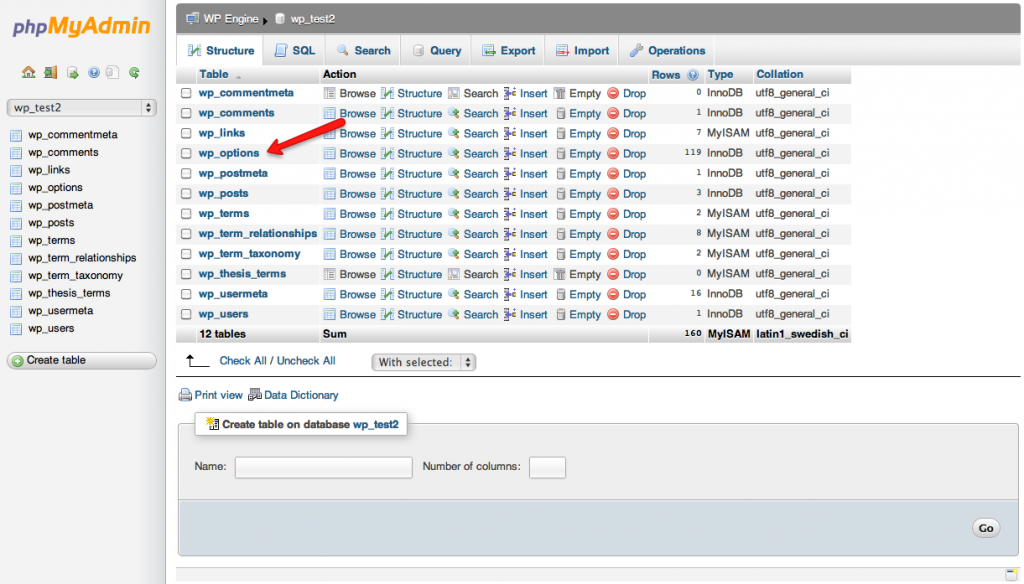
The database contains a set of tables which store a collection of values. Locate the ‘wp_options’ table and click on it.
SELECT ‘SITEURL’ OPTION
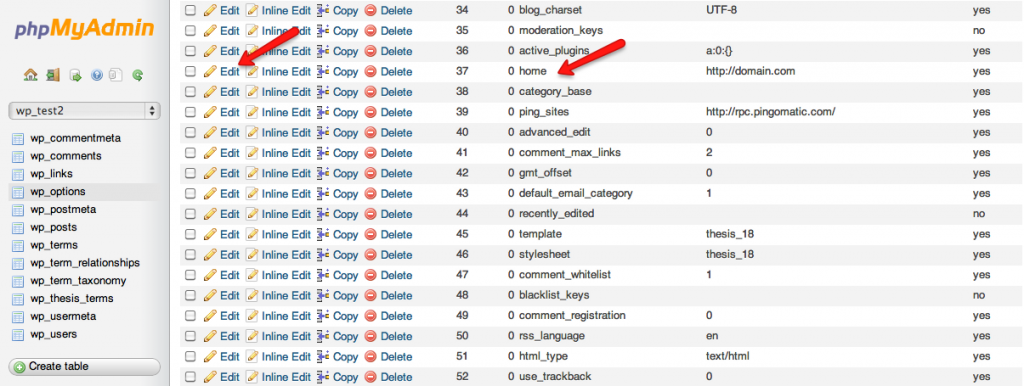
The table contains a collection of options and values. Locate the option ‘siteurl’ and click on ‘edit’ in the row where you see the option.
EDIT ‘SITEURL’ OPTION VALUE
Edit the ‘siteurl’ value from your current domain name to [websitename].wpengine.com. Then click on ‘Go’ at the bottom of the page to save the changes.
SELECT ‘HOME’ OPTION
Go back to the ‘wp_options’ table, locate the ‘home’ option, and click on ‘edit’ in the same row.
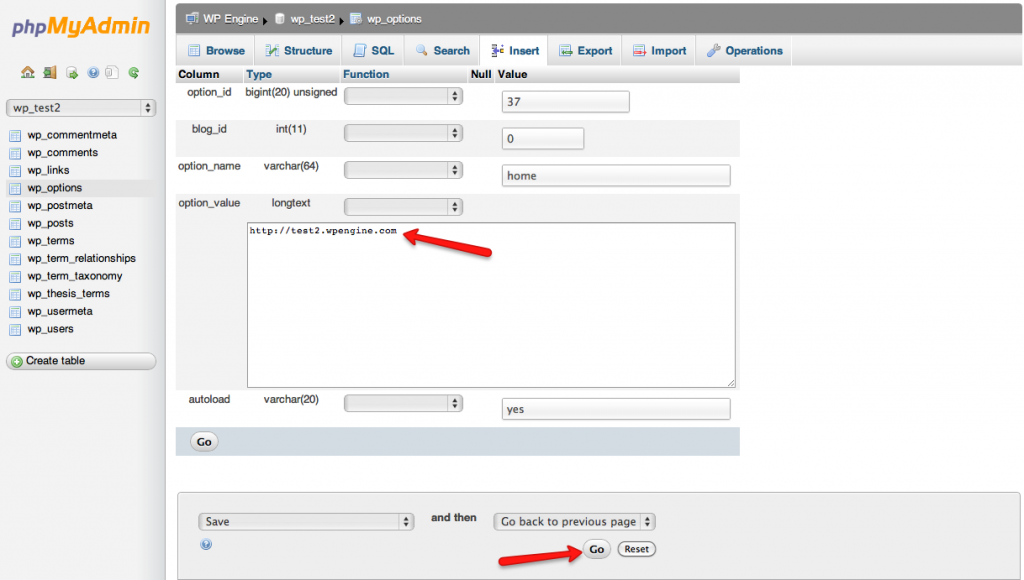
EDIT ‘HOME’ OPTION VALUE
Edit the ‘home’ value from your current domain name to [websitename].wpengine.com. Then click on ‘Go’ at the bottom of the page to save the changes.

*Note: We make extensive use of a caching system known as Varnish. Since it caches so aggressively, you may need to contact support to “purge” Varnish, so that the old cache is removed. This ensures that you’re loading the freshest version of your website. Also, this has been known to correct issues relating to “redirect loops”. Keep in mind that clearing the Varnish cache is different than the “Empty Caches” button you’ll find in the WP Engine menu.


