SSH, also known as Secure Shell, is the method of connecting from your local machine to the web server where your site’s content is hosted. With SSH Gateway access you can use a variety of command-line tools like: WP CLI, MySQL command line, and bash to manage your website.
SSH Gateway uses key-based authentication for even greater security than a simple username and password combination. In this article we’ll cover the steps and all you need to know to get started with SSH access on your website.
Please note: SSH Gateway is available for customers on dedicated servers. Please contact your Account Manager to check if your account qualifies for access.
Step One: Access Your User Portal
First, verify SSH access has been enabled for your account. Then your first step to get started with SSH Gateway is to log into your WP Engine User Portal. Just enter your email address and password to log in.
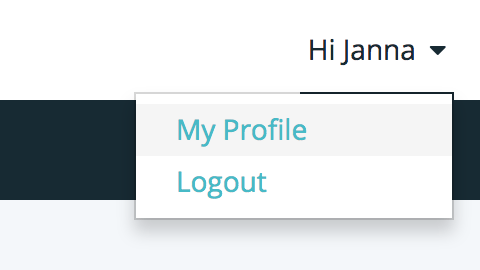
Next, click the dropdown menu next to your name:

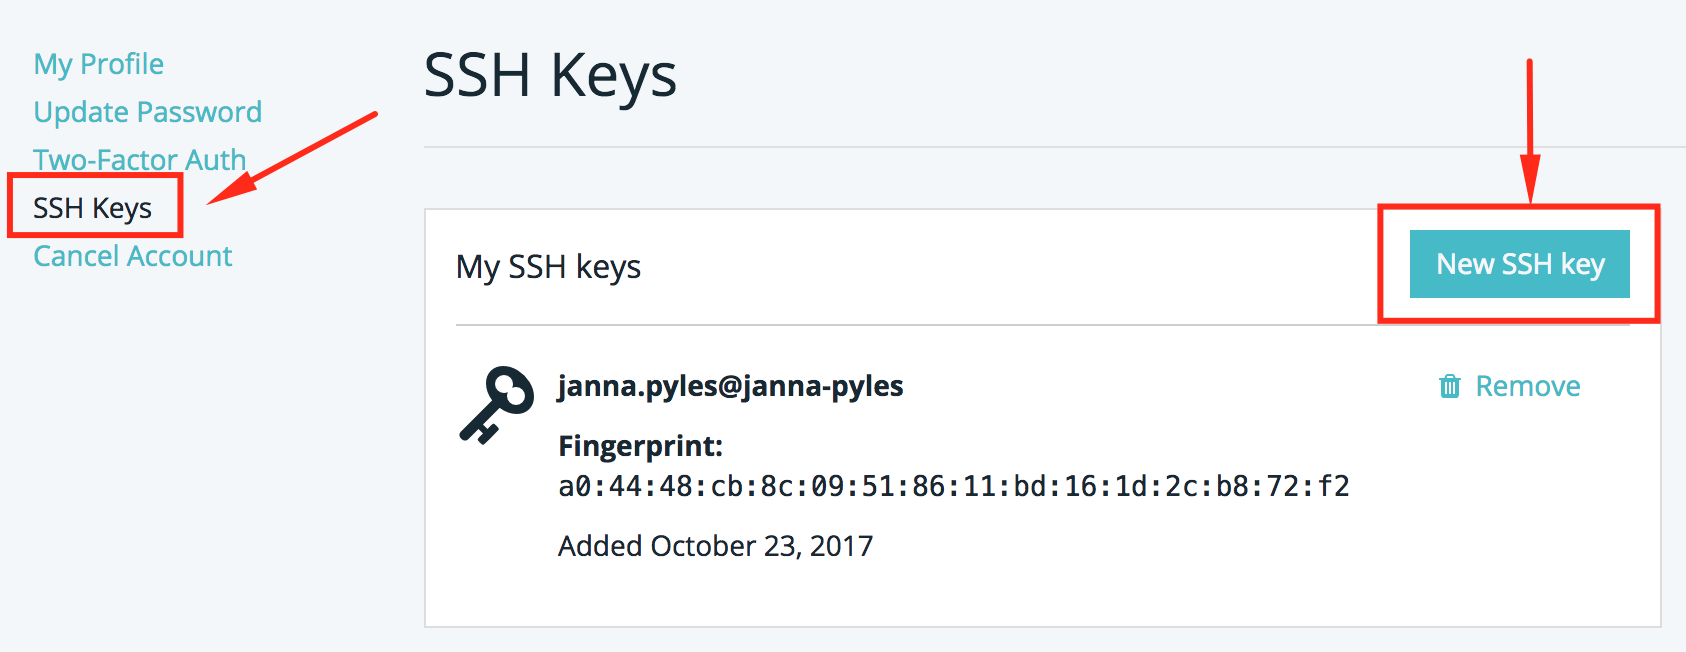
On the left side, click “SSH Keys”
Step Two: Create and/or Add SSH Keys
Next you will need to add your SSH key. If you already have a key labeled “wpengine_rsa.pub” on your local machine, you can simply add the public key here. If not, please follow SSH Key Management first. The SSH key must begin with “ssh-rsa,” with the entire key following on a single line (rather than spread across multiple lines).
Your computer’s key can be used for all installs to which your WP Engine User Portal user has access. If you have multiple computers (e.g. one at home, one at work) which you will use to connect over SSH, it is best practice to use a separate key for each. You can add multiple SSH keys as needed on this page.
Pro tip: Each SSH Gateway user should add their own SSH key as a best practice. This makes access management for SSH Gateway more simple: Users will only have SSH Gateway access to the supported installs to which they have access.
Step Three: Connect to SSH Gateway
When connecting to SSH Gateway, you can use the following syntax. Be sure to replace the “install” fields with your WP Engine environment name:
If you do not use an SSH config file to manage multiple keys, you will need to specify which key your machine should use to authenticate the connection like so:
ssh -i ~/.ssh/wpengine_rsa -o IdentitiesOnly=yes [email protected]
If you encounter any errors in connecting, please reference our Troubleshooting SSH Connection Issues guide.
Step Four: Interact with Your Files and Database
After connecting to SSH, you will need to enter the directory for your website to see and interact with your files. To do this, type:
cd sites/yourenvironment && ls
Be sure to replace “yourenvironment” with your WP Engine environment name! You will then be in your website’s root directory, and have a listing of the files and directories in your website. Please note: If you add files above the root directory for your website, such as files or directories in the “sites” folder, these files will not persist past the end of your SSH session. Only files added to your website’s root directory or lower will persist.
Now that you have successfully set up your keys and connected, it’s time to get started using SSH Gateway to simplify your life! You can use WP-CLI, bash loops, edit files using your favorite editor, and many other CLI tools. Be sure take a backup prior to making any changes, and to reference our FAQ for answers to common questions about SSH Gateway.
Example commands
Below are some examples of commands you can use:
Import a SQL file to your WordPress site’s database with WP-CLI:
wp db import mynewsqlfile.sql
Install and activate the WooCommerce plugin with WP-CLI:
wp plugin install woocommerce --activate
Run database queries with WP-CLI:
wp db query "SELECT * FROM wp_users WHERE user_email='[email protected]';"
See if WordPress core files have been modified:
wp core verify-checksums
Add “administrator” capabilities to a user named “wpengine” with WP-CLI:
wp user add-cap wpengine administrator
Search-replace for olddomain.com to newdomain.com using precise (PHP-based search) on all tables with WP-CLI:
wp search-replace “olddomain.com” “newdomain.com” --all-tables --precise
Sync all the files from folder1 to folder2 using rsync (non-destructive):
rsync -rvP folder1/ folder2/
Sync example.png on your local machine to folder4 on your website (non-destructive):
rsync example.png [email protected]:/sites/yourenvironment/folder4
Edit a file named myfile.txt using vim:
vim myfile.txt
Enter MySQL command line and query your table storage engine for all tables:
mysql
SELECT table_name, Engine FROM information_schema.tables WHERE table_schema='wp_myinstall';
 +-----------------------+--------+
 | table_name            | Engine |
 +-----------------------+--------+
 | wp_commentmeta        | InnoDB |
 | wp_comments           | InnoDB |
 | wp_ewwwio_images      | InnoDB |
 | wp_gdbc_attempts      | InnoDB |
 | wp_links              | InnoDB |
 | wp_nxs_log            | InnoDB |
 | wp_options            | InnoDB |
 | wp_postmeta           | InnoDB |
 | wp_posts              | InnoDB |
 | wp_smush_dir_images   | InnoDB |
 | wp_term_relationships | InnoDB |
 | wp_term_taxonomy      | InnoDB |
 | wp_termmeta           | InnoDB |
 | wp_terms              | InnoDB |
 | wp_usermeta           | InnoDB |
 | wp_users              | InnoDB |
 | wp_yoast_seo_links    | InnoDB |
 | wp_yoast_seo_meta     | InnoDB |
 +-----------------------+--------+
 18 rows in set (0.00 sec)
Update WordPress to version 4.9.1 for multiple sites using a bash loop*:
for install in myinstall1 myinstall2 myinstall3; do ssh $install@$install.ssh.wpengine.net && cd /sites/$install && wp core update --version=4.9.1; done
*You should run loops which iterate through multiple installations from your local machine