
Migrating your website to WP Engine has never been easier! In this article, learn how to move your website content and database to WP Engine using our Automated Migration plugin, created in partnership with Blogvault.
Pre-Migration
Before moving your content and database to WP Engine, we assume you’ve already done the following things:
- Opened an account with WP Engine
- Created a new site/environment on WP Engine for this website
- Have a website on another hosting platform you wish to move to WP Engine
If you have done all of the above, feel free to move on to the next steps!
Step 1: Download the plugin
The first step in moving your website to WP Engine is to download our WP Engine Automated Migration plugin on your existing website from the WordPress repository. Find the “Add New” option under “Plugins” in your WordPress Admin Dashboard, and search for “WP Engine Automated Migration.”

Then, select to Install and Activate the plugin.
Step 2: Generate SFTP credentials
Next you will need to generate a set of SFTP credentials in your WP Engine User Portal. Select the environment you created for this website from the list of sites, then click “Site migration” from the left-hand navigation.
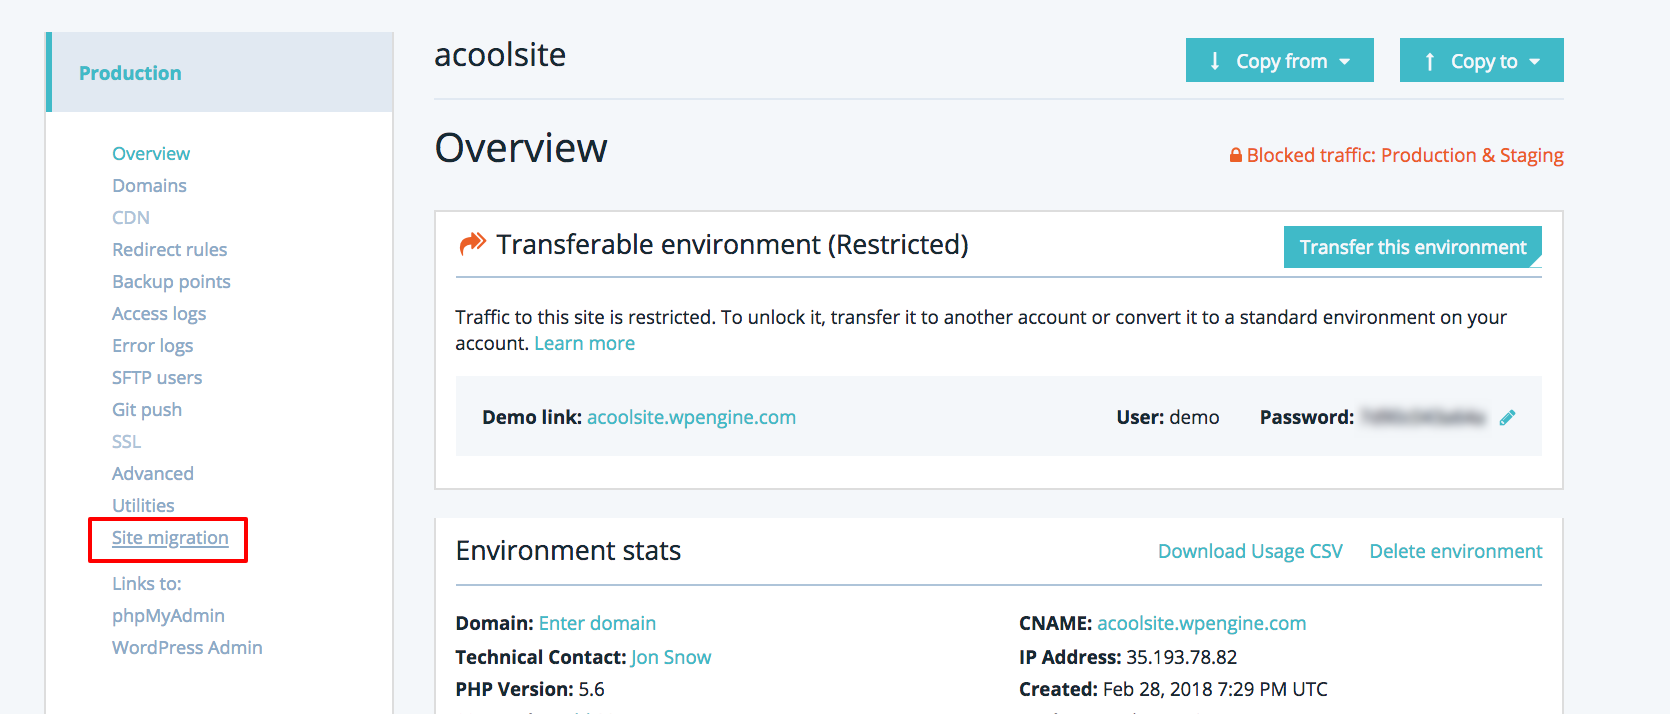
When you click “Site migration,” a set of SFTP credentials are automatically generated for this migration and will display on your screen, under an instructional video.
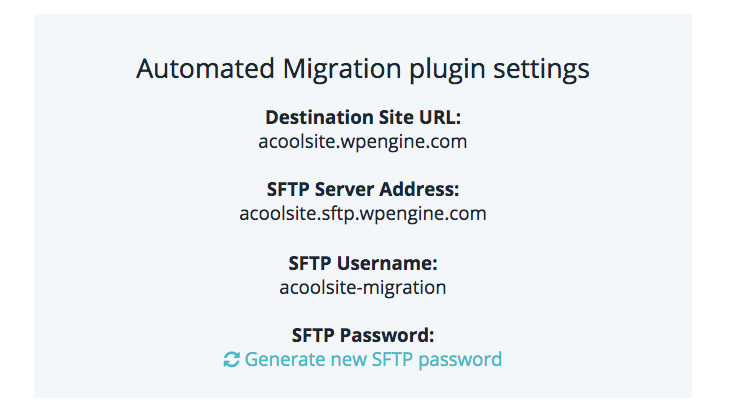
Click “Generate new SFTP password” to finish creating your SFTP credentials.
Step 3: Enter SFTP credentials into plugin
Back in your WordPress Admin Dashboard, click “Site Migration” from the left hand navigation. You will see a screen prompting you for the SFTP credentials you just generated.
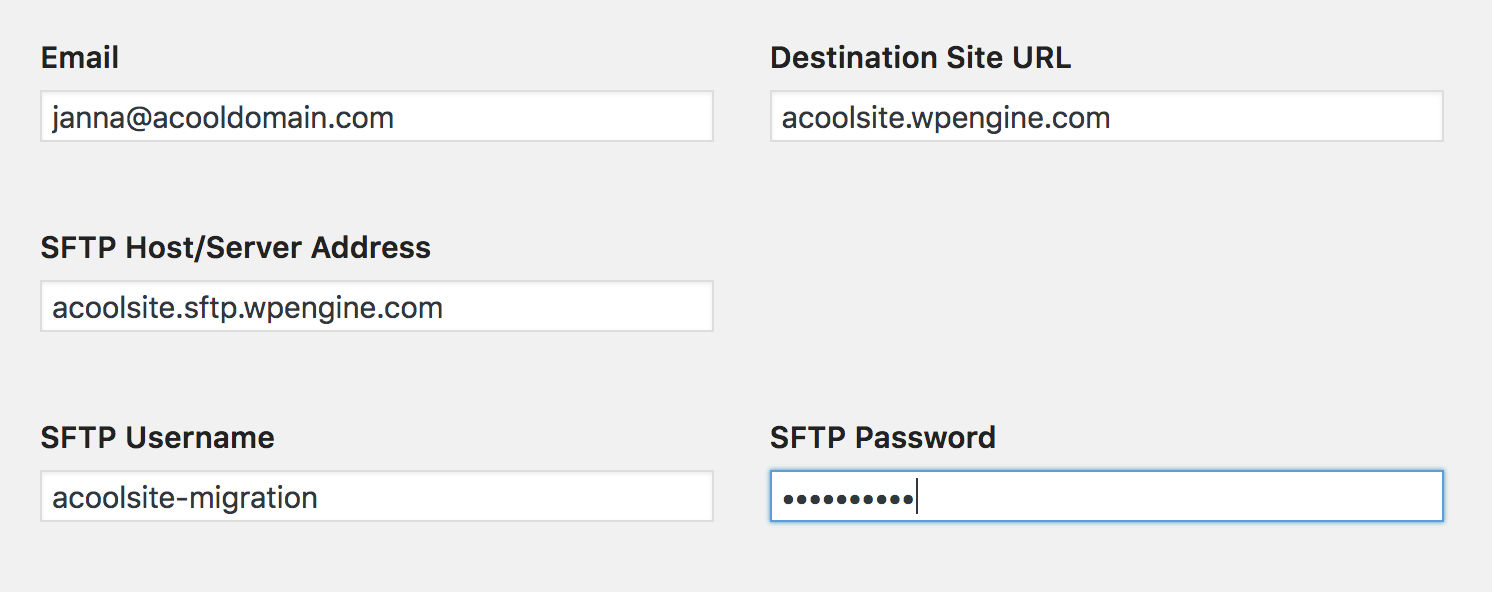
If your site is a transferable site with WP Engine, or otherwise has password protection enabled either on your current site or on WP Engine, enter your password protection username and password in the section below.
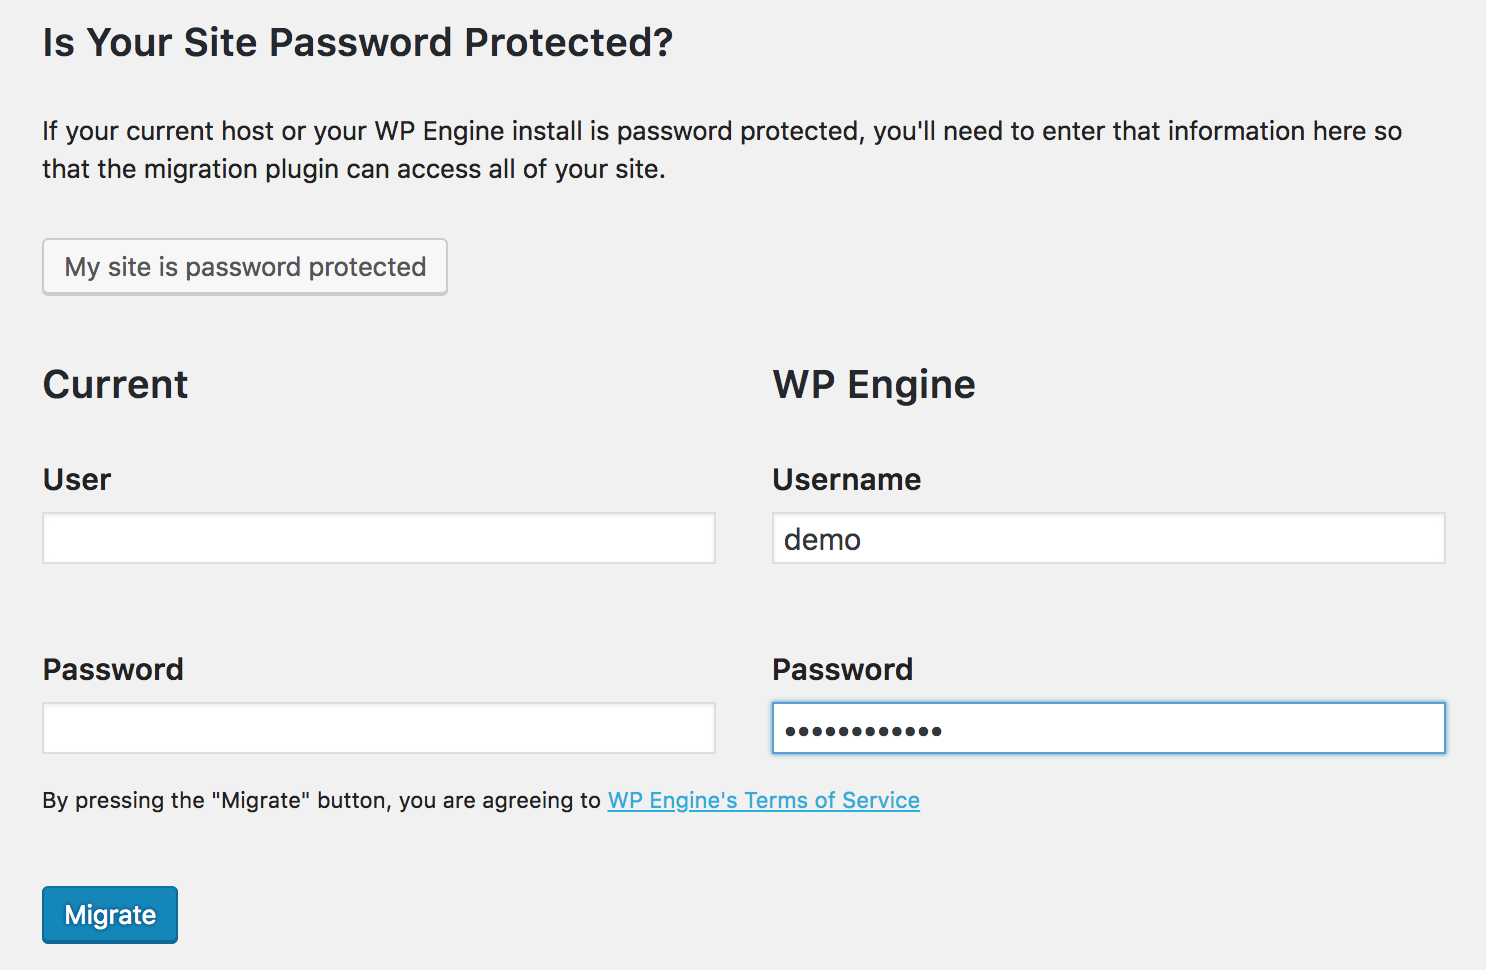
Last, select “Migrate” to begin the migration to WP Engine.
Step 4: Blogvault Migrates Website
At this stage you will be taken to your migration in the Blogvault dashboard to view the migration progress. In case you accidentally close the tab, an email containing a link to the dashboard is also sent when your migration is initiated.

Note: Don’t change any WP Engine settings while your migration is running! This can cause unexpected errors due to the proactive checks performed by the plugin in the migration process.
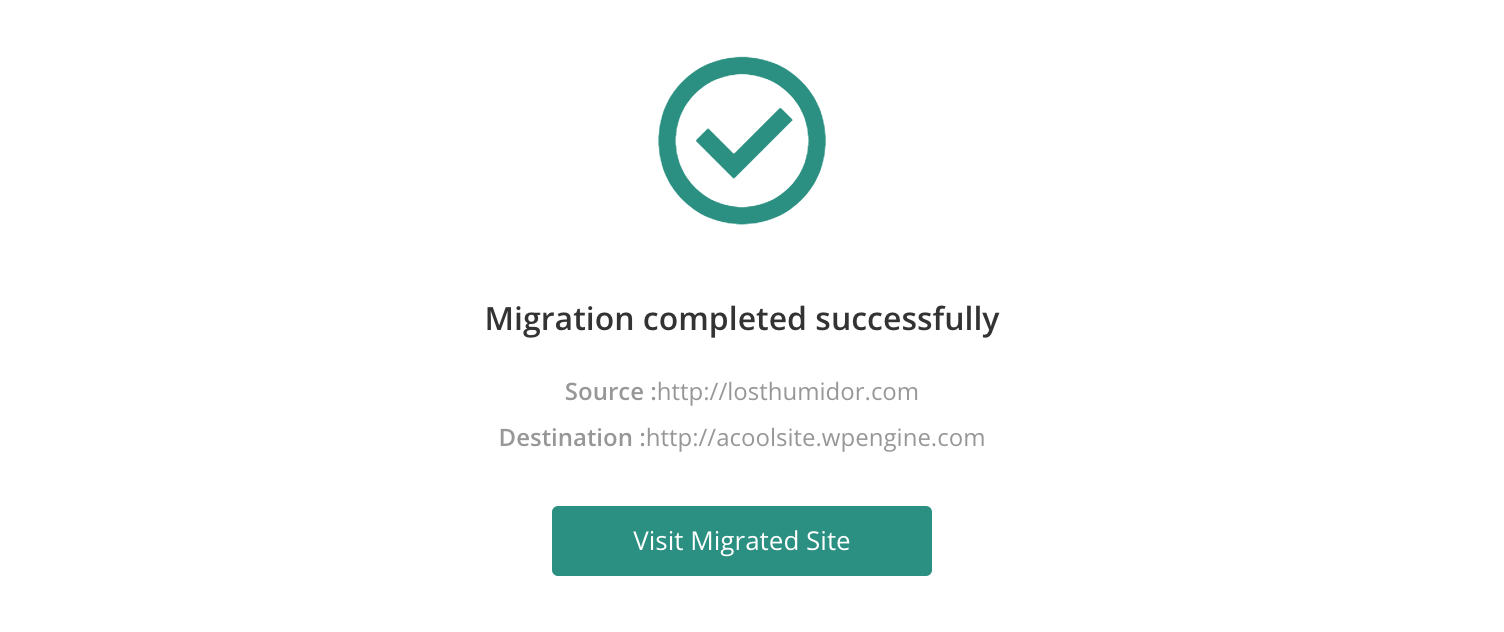
You will also receive an email when the migration is completed. At this time your website’s content and database have been copied to WP Engine, and you will be able to view it at your [environment].wpengine.com URL.
Step 5: Add domain in User Portal
After migrating your content and database to WP Engine, we understand it may take some time to ensure your WP Engine site is ready to go. Just before going live, you will need to add your domain to the User Portal.
Select your environment from the list, then click “Domains” from the left-hand navigation. Add your domain (acooldomain.com and www.acooldomain.com) to the list and select which should be the “primary domain,” redirecting the others to it. Follow our guide, Add Your Domain to User Portal, for full steps.
Step 6: Finalize migration
Last, you will need to bring over any changes to your live site over to WP Engine, and update your WordPress URL. You can do this all in one step by running the migration plugin a second time!
This time, enter your live domain as the “Destination Site URL,” keeping all the other fields the same.
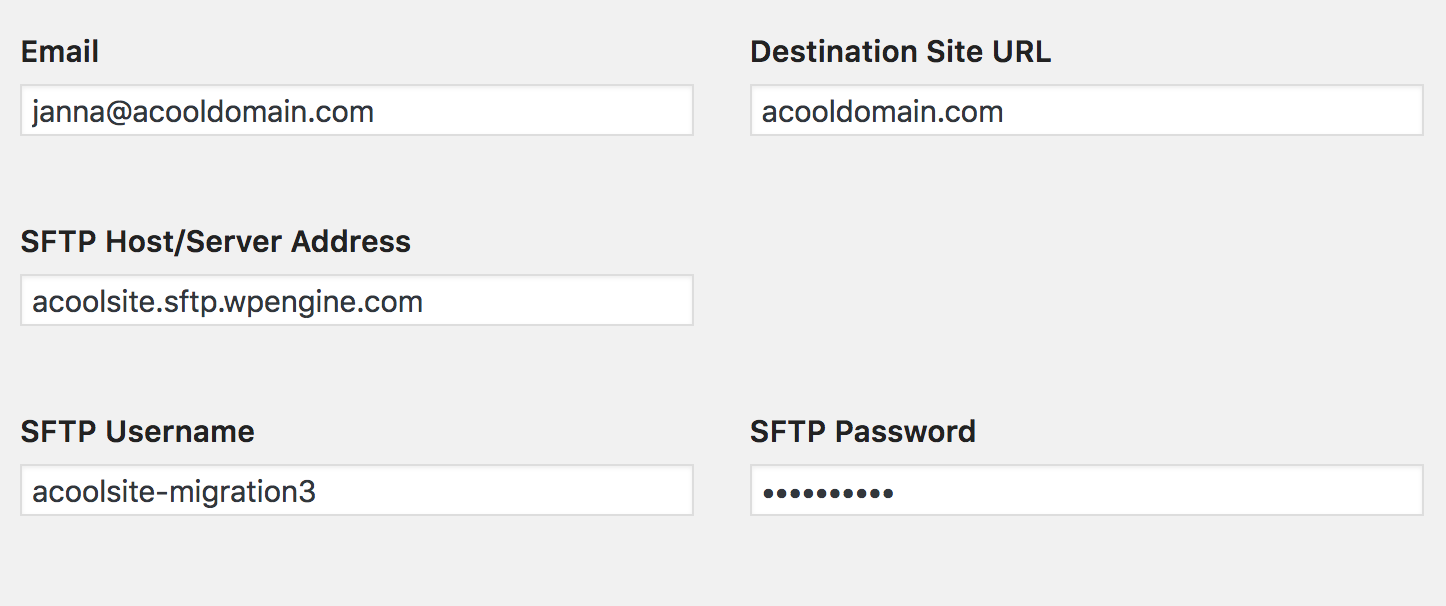
The WP Engine Automated Migration plugin is intelligent enough to know that this is a second migration and will only migrate the new content and changes. However, keep in mind that it will migrate the entire database again, replacing what is in place on WP Engine with what is most current on your other hosting provider.
Note: After this second migration you will be unable to log into your WordPress Admin Dashboard on WP Engine until you update your DNS records. The plugin will update your WordPress URL in the WordPress Admin Dashboard, and consequently, will require DNS updates to access the dashboard again.
Post-migration steps
After your second migration, you will also need to update your DNS records in order to “go live” on the WP Engine platform. You may also want to ensure any needed redirects are added to the WP Engine User Portal.
Learn how to update your DNS records
After updating DNS to point to WP Engine, you may add a free Let’s Encrypt SSL to your website via the WP Engine User Portal. This will ensure your users will see a green padlock when visiting your website. An SSL certificate will also encrypt user data entered on your website.
Common errors
| Error Message | Meaning |
| Could not connect to server. Please check the address. | The SFTP credentials you provided are incorrect. You can verify that you are using the right SFTP credentials by visiting the Site migration page for your environment in your User Portal. |
| Error! The URL specified is incorrect. Can you please check if your WP Engine account is configured with [domain] | The domain entered in the “Destination Site URL” field is not configured in WP Engine’s dashboard for the environment. Ensure the domain has been added to User Portal. |
| “Unknown” with a white screen | This error is caused by a conflict with the Cloudflare WordPress plugin. Deactivate the plugin to run the migration and you will be all set. |
| That email is already in use. | You have an old version of the WP Engine Automated Migration plugin installed. Update or delete and reinstall the plugin in your WordPress Admin Dashboard to resolve the issue. |
Known incompatibilities
In addition to the common errors above, some website hosts have known incompatibilities with the WP Engine Automated Migration plugin. These incompatible hosts include, but are not limited to:
- WordPress.com
- Local Hosting Environments
- Proprietary Hosting Providers (Wix.com, SquareSpace.com, and other similar companies)
If your host is incompatible with the WP Engine Automated Migration plugin, you may move your site to WP Engine using our Manual Migration Checklist instead.