
If your domain registrar is Bluehost, this guide will help you configure your Bluehost DNS settings to point to WP Engine. This is a required step to go live with your domain on the WP Engine platform.
Please note: Before changing your DNS, please be sure to add your domain in the WP Engine User Portal!
Step 1: Locate Your DNS Information in User Portal
The first step is to locate your CNAME and A Record in your WP Engine User Portal. You can find this information from the Overview page for your production environment.
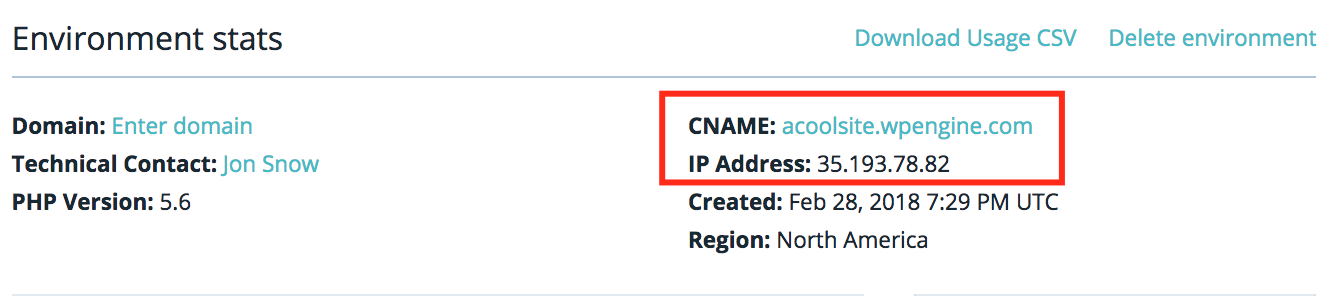
Keep this page open as you continue through the following steps for easy copying!
Step 2: Log into Bluehost
Now in a separate tab, login to www.bluehost.com with your username or domain name, and password. From this page, click Domains from the left navigation and select Zone Editor.
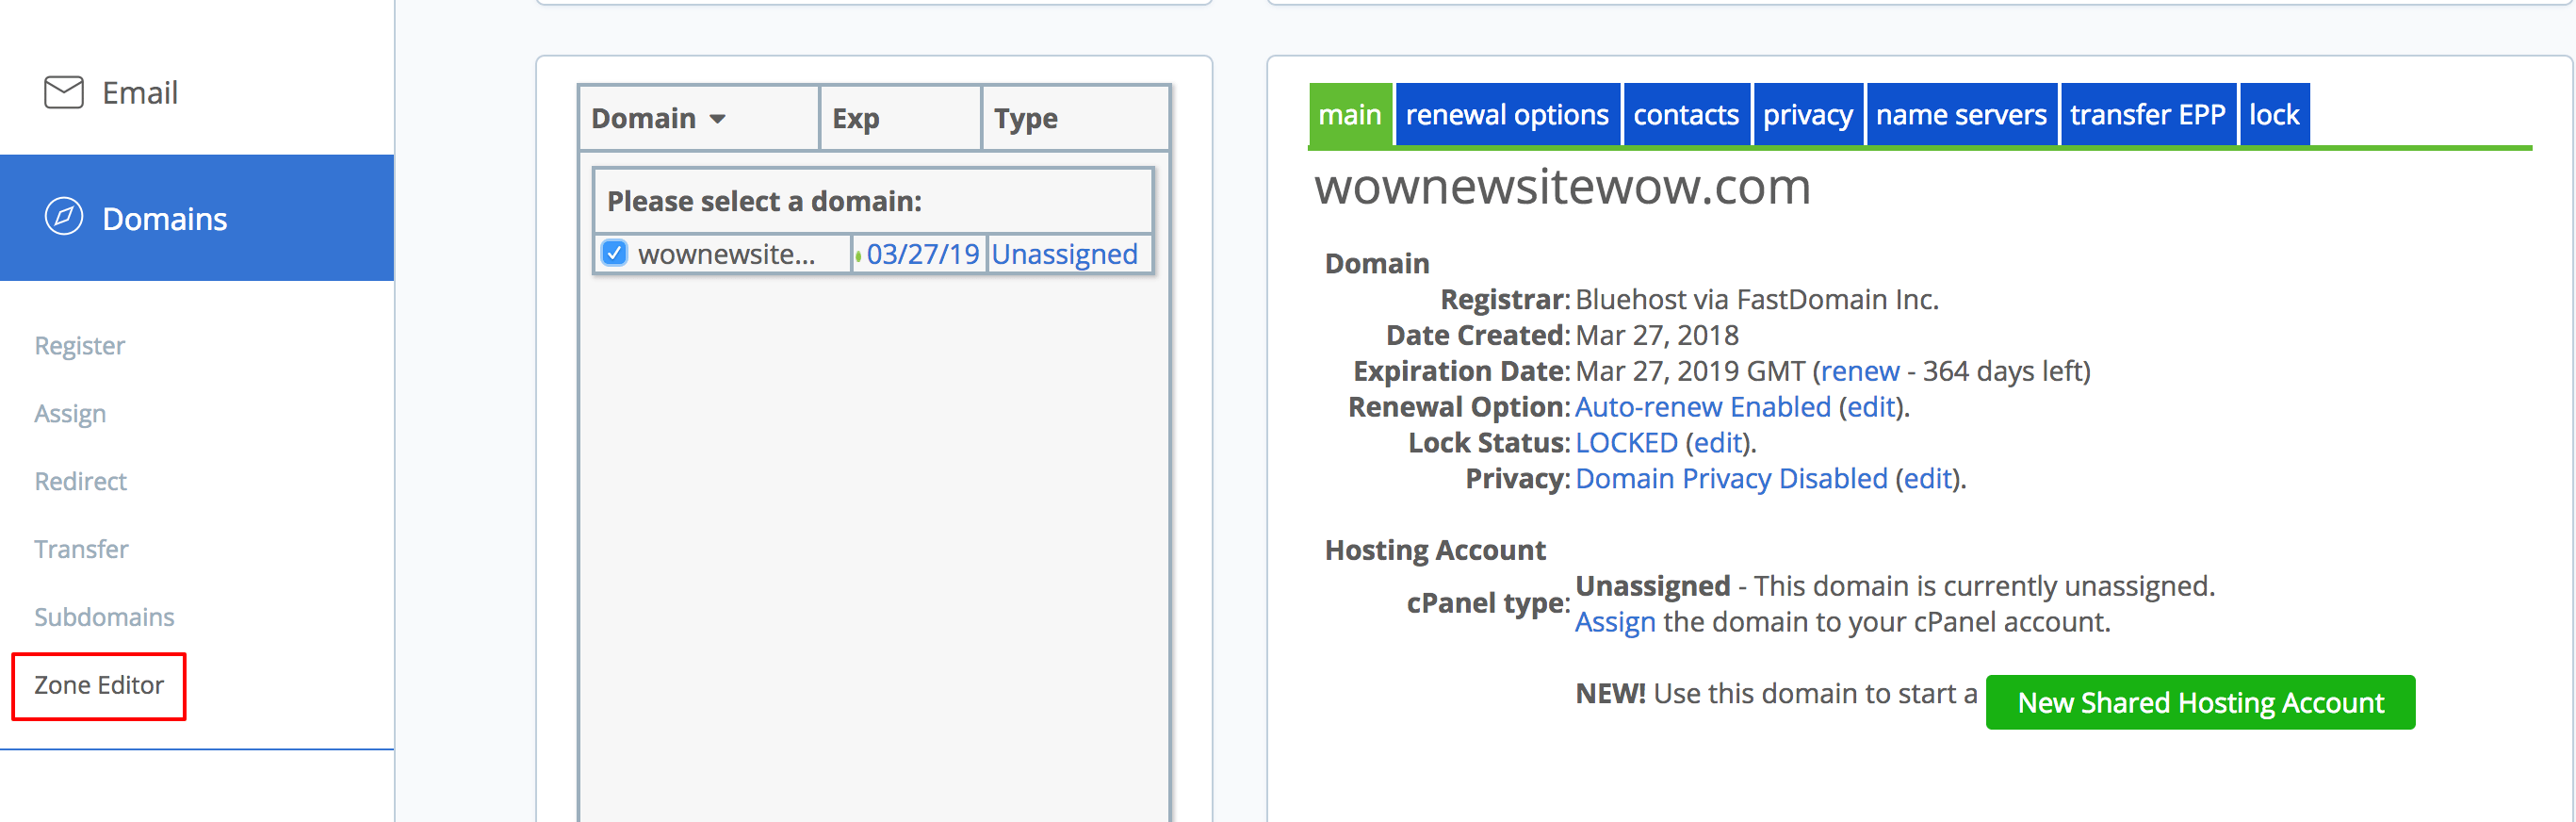
On the Zone Editor page we will be adding or editing your existing DNS records to point to WP Engine.
Step 3: Change DNS Records
On your Bluehost Zone editor page you will see a list of options. In the dropdown menu, select the domain you wish to point to WP Engine and look to the options for “A (Host),” and “CNAME (Alias),” lower down on the page.
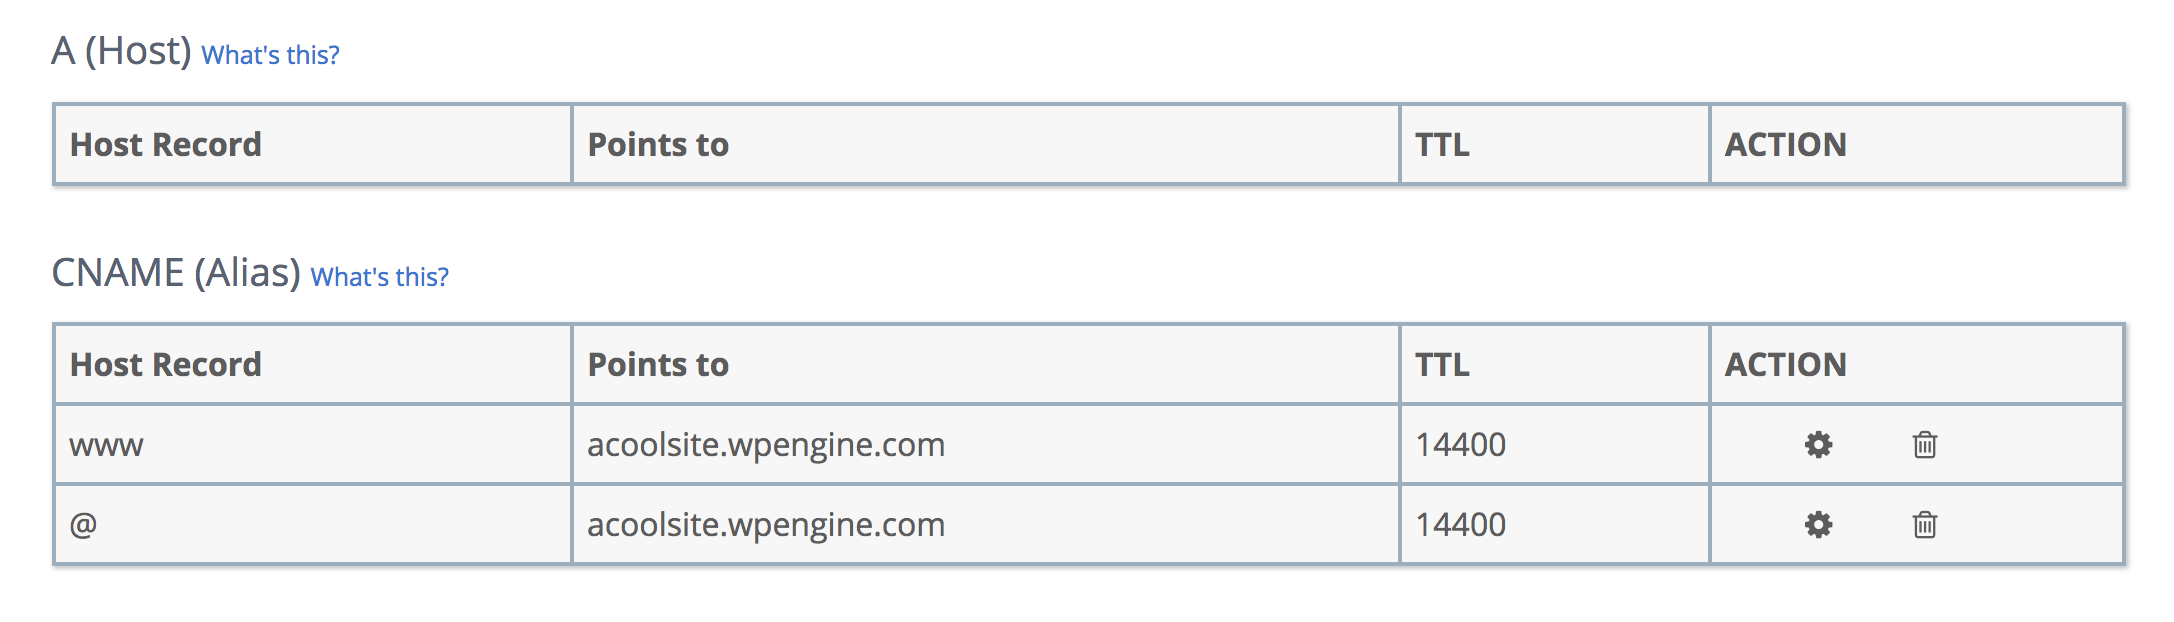
You most likely already have a listing under the “A (Host)” section, listing “@” for the Host record. Because “@” is set as an “A (Host)” record, this means it is pointed to an IP address. You may either edit the IP address shown here to the one on your Overview page in User Portal, or delete the record to add a new CNAME (Alias) record for “@” instead (recommended).
If you chose to delete and add a new record, enter “@” in the “Host record” field, select CNAME as the “Type,” and enter your CNAME from the Overview page in your User Portal in the “Points to” section.

Tip: If possible, we recommend configuring CNAME records. This means if your website is ever migrated to a new server, you will not need to come back and update DNS again.
If your “www” record is already configured as a CNAME (Alias) record, you can simply edit this record by clicking the gear icon. Then, enter your CNAME from the Overview page in your User Portal in the “Points to” field. When saved, your settings should look like this:
Now all that’s left is to wait for the changes to propagate! You will notice for both records, the “TTL” field is set to “14400” by default. TTL is the number of seconds until propagation of the changes completes. For Bluehost, 14400 (4 hours) is the shortest TTL possible. In the meantime, please review our Going Live guide to make sure you didn’t miss any steps.