After importing your website content, your live website might have been updated with new posts and pages. If you migrated your site to WP Engine using WP Engine Automatic Migration, the plugin can be used to perform a second migration for just newer content.
However, if you manually migrated your site to WP Engine, you can manually sync posts and pages to your site on WP Engine. The built in import/export WordPress function allows you to easily sync new posts and pages without needing to reimport the database. Even though the export will contain all of the posts and pages, don’t worry about creating duplicate content. Only new posts and pages will be created.
Please feel free to follow along within the Migration Checklist to sync your posts and pages, which you will find in your User Portal under the “Verify” phase.
LOCATE EXPORT:
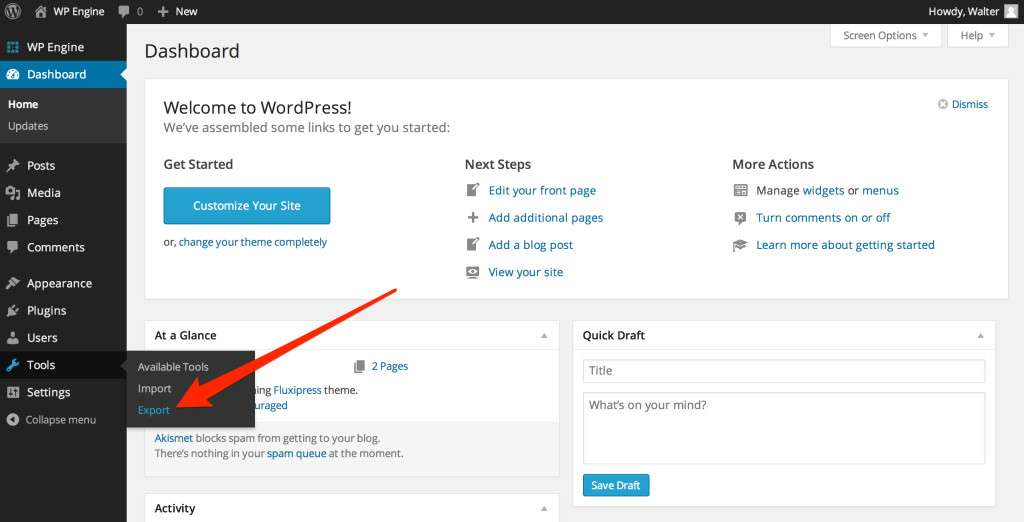
Log into the live website where you have the new posts and pages, and go to Dashboard > Tools > Export.
GENERATE EXPORT:
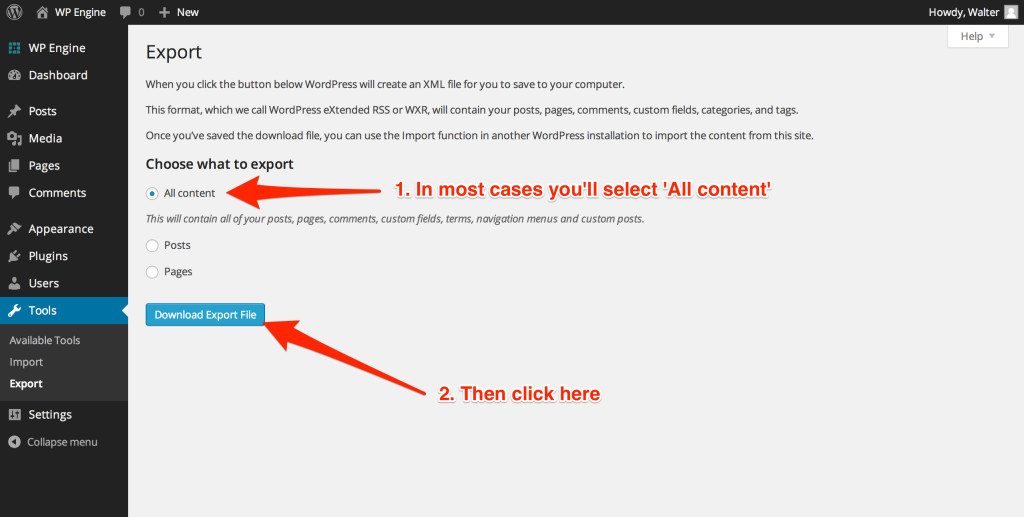
To sync new posts and pages manually, you will need to export your content. On the Export screen, select ‘All Content’ and click on ‘Download Export File’ – this will download a XML file to your computer
Should you choose to export posts only, keep in mind that featured images will not be carried over. These featured images will need to be re-added to each post imported when only posts are brought over.
LOCATE IMPORT:
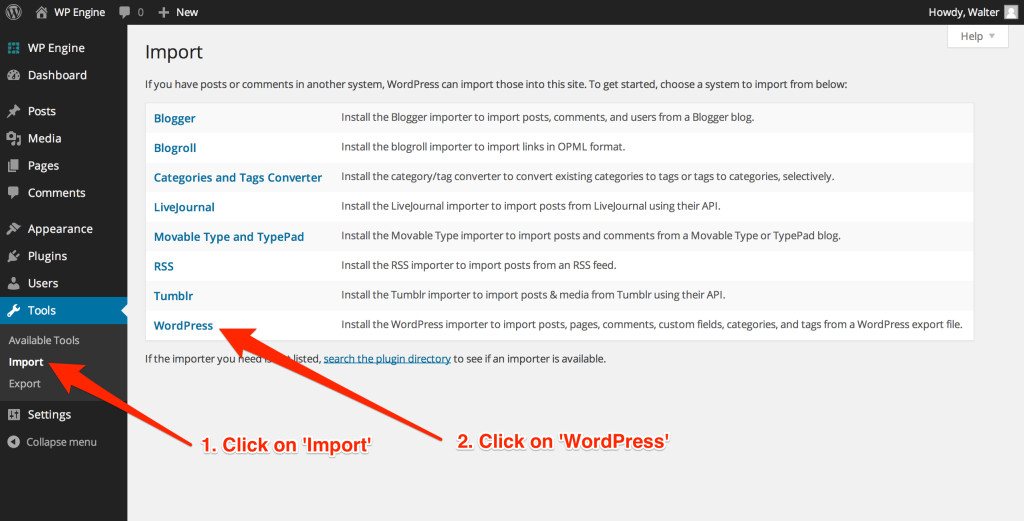
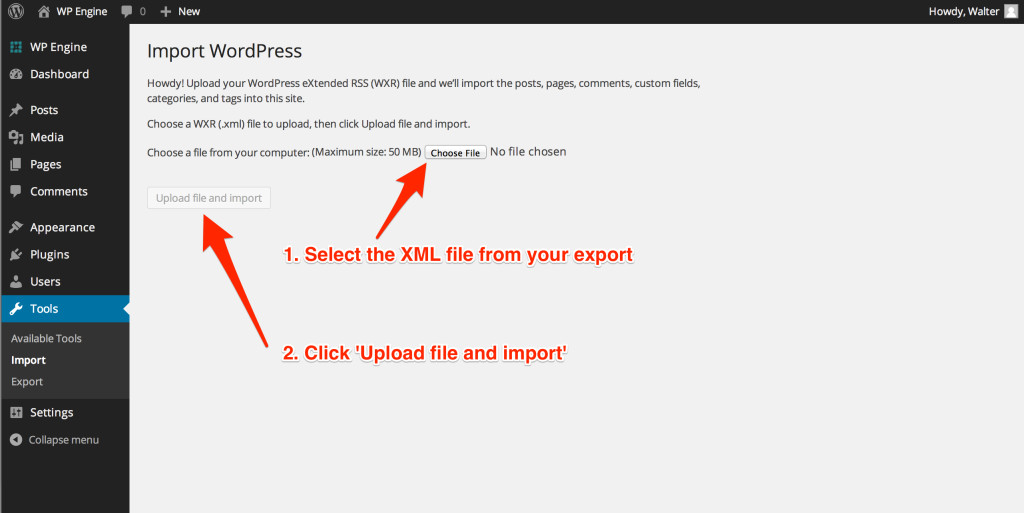
Log into the WP Engine website and go to Dashboard > Tools > Import. From here, select “WordPress” from the list. Next, If you do not have WordPress Importer installed already, you will see a prompt asking if you want to install this plugin – please install the plugin.
IMPORT THE XML
On the Import screen, click ‘Choose File’ and select the XML file that was generated in the last step. Next click ‘Upload File and Import.’
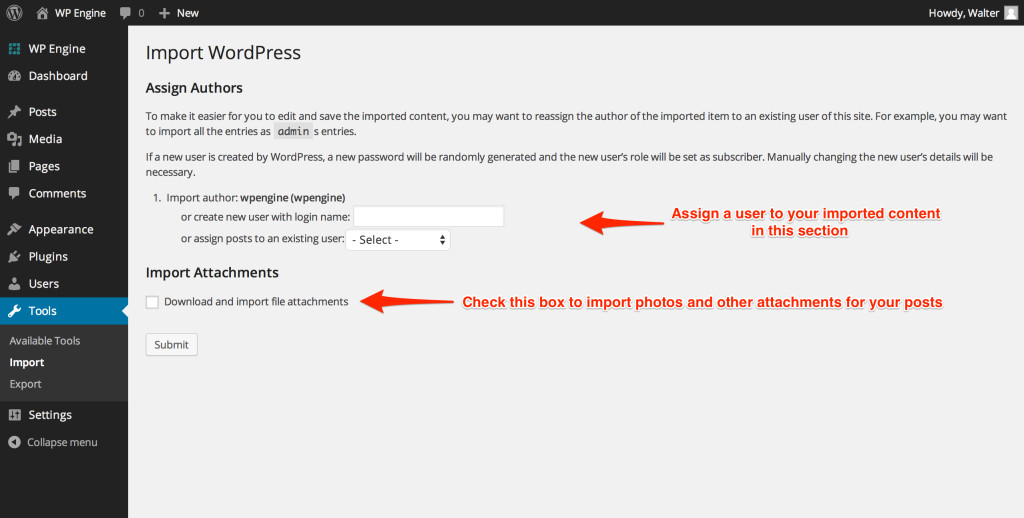
On the next screen, select the name of the Author that will be attributed to the posts and pages. In addition, click on ‘Download and Import File Attachments’ – this will download media embedded into the posts and pages like videos and images. Finally click ‘Submit’ to upload the XML export.
