Please note: The content on this page refers to functionality on Personal, Professional, and Business plans. If you are on a Startup, Growth, or Scale plan, learn more about functionality available on your account.
Many WP Engine customers leverage multiple environments to create an advanced deployment workflow like the classic triad: development, staging, and production (dev/stage/prod).Our Environments feature eliminates the guesswork and makes it easy for you to identify how you are using a particular install. No more confusion about which site is actually in production. No more cryptic install names. Your team has fewer questions and greater clarity.

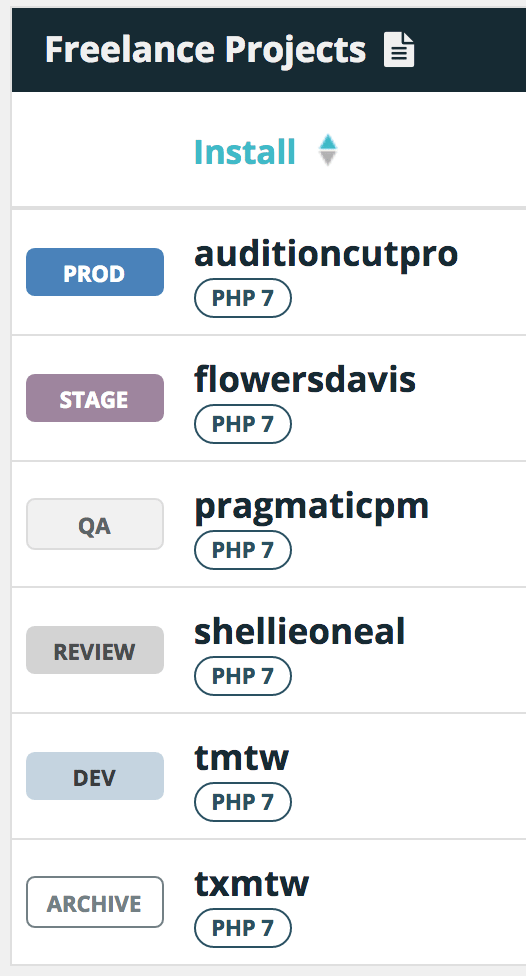
 At present, we have six different named environments you can apply in any way you like. Below are the environment names, abbreviations, and our recommendations for how to use them:
- Production (PROD) – Environments that are production-ready and generally publicly facing
- Staging (STAGE) – Pre-production environments that can be used to test code before deploying to production
- Quality Assurance (QA) – Dedicated environments for testing and breaking code from other environments
- Review (REVIEW) – Environments where you can demonstrate or showcase site development for clients or other stakeholders
- Development (DEV) – Primary environments for building and developing your site
- Archive (ARCHIVE) – Unmaintained environments, such as expired or completed projects
Environments Meaning
Today, Environments are intended to keep your team aligned and to help you visualize your unique workflow in the WP Engine User Portal. They do not have any configuration differences other than those you explicitly change via the User Portal.
We have big plans for the future of Environments and further integration into our platform, so stay tuned for future improvements and updates!
Adding and Changing Environments
- Visit the install overview page for the install you’d like to assign an environment.You’ll see a new label, for Environments, in the “Install stats” box.

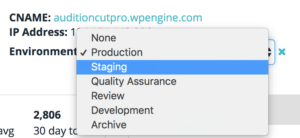
- Click the environment name to change it. If the install has no environment this will say “None.”

- Choosing an environment will automatically save your choice, and if you’d like to cancel changing your selection click the ‘x’ to the right of the dropdown.
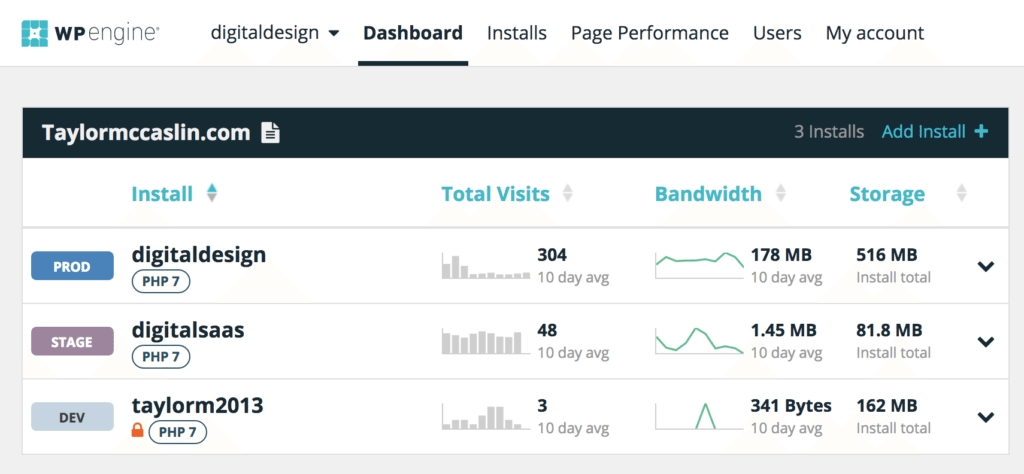
That’s it! You will now have a nice environment displayed on the dashboard page.
Organize Your Workflow
By using Workspaces and Environments, you can visualize the unique development workflow and organizational structure of your company, andyou can visually organize this workflow in your User Portal account. It’s never been easier to keep everyone on the same page. No more answering questions like, “What’s the development site?”, “How do we do deployments?”, or “Who’s using staging right now?”