The WP Engine User Portal is your account’s portal page and has access to all our major features. Below we’ll walk you through each of those features and how you can utilize them on your WordPress site as well as the many other features you can benefit from within the User Portal. If you are on a Startup, Growth, or Scale plan, or have the new “Sites” section in your User Portal, Explore Your Sites in User Portal instead.
Dashboard
This is the default page upon logging into the User Portal. You’ll find all the installs that you have access to here along with the following items:
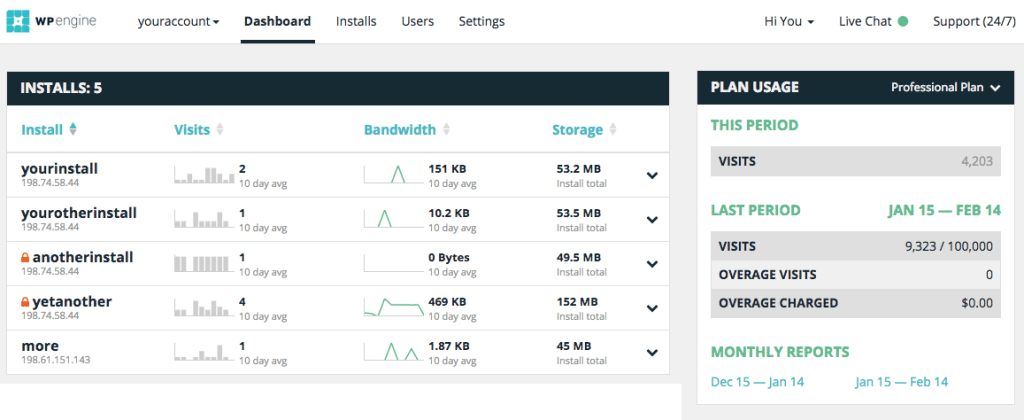
Monthly Reports – This report outlines all visits to all sites within your WP Engine account for the selected time period. You’ll find summaries of the top static and dynamic requests, browser user agents, and bot traffic. Also, you’ll be able to view visits based on countries and mobile vs non-mobile connections.
System Status – Here you can find live updates on everything relating to the WP Engine platform. Be sure to subscribe to the blog so you can receive email notifications should we make a post here.
Blog – Our blog contains posts revolving around all things WordPress, technology, and WP Engine. Innovation is one of our staples at WP Engine and any new product or feature will have a write up outlining all the benefits it will provide.
Installs
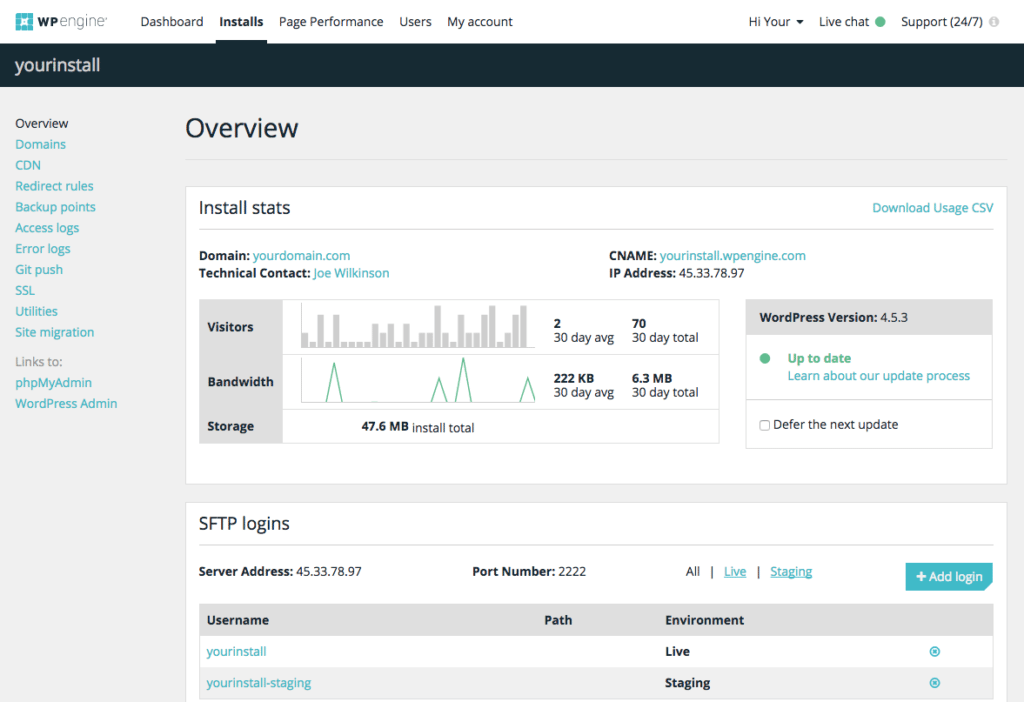
Overview – The Overview tab is the default tab upon loading the Installs page. You’ll find access to the following information from the Overview tab:
SFTP Logins – Here you’ll find existing SFTP usernames and the environments they have access to. Along with the server address and port number you need to use when connecting via SFTP. You can also select to add additional logins, set passwords, and file path restrictions for them, in case you want to give specific access to a developer.
Domains – This tab will show all the domains you’ve added and any domain redirects that have been setup. By default [yourinstall].wpengine.com will display here and should not be removed. Best practice is to add your domain (yourdomain.com) from the Add Domain button and in the Redirect From field you can enter any domains you’d like to redirect to it (like www.yourdomain.com for example).
CDN – By default our Professional and Business plans have a Content Delivery Network accessible through the User Portal. A CDN will allow your static assets to be off-loaded to geographically distributed servers so a visitor’s connection will download from a geographically close server. You can enable specific domains to be setup under the CDN in this tab. Our Personal plans need to purchase a CDN through us during signup, or contact us via our 24/7 Live Chat to have it added to your plan later on.
Redirect Rules – Here you’ll be able to add redirect rules via REGEX based on various arguments and domains. You can read further in our article, Setting Up Redirects.
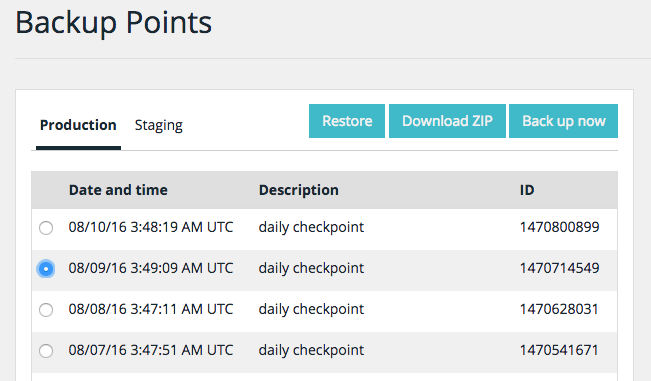
Backup Points – We create a backup point every day for every install and staging area you have with WP Engine. These backup points should be used if you encounter an error that prevents your site from loading – you can simply restore from a prior backup. A best practice is to create a backup before updating and installing plugins and themes.
Back Up Now – This button allows you to create a backup at any point in time. A best practice is to create a back up before and after you update a plugin or theme. We also recommend you provide a description of the changes you’re making to the site in the modal popup after selecting Back Up Now. You can also add additional email notifications once the back up has been completed.
Access Logs – Here you can find and search through the last 24 hours of Apache and Nginx logs. You’re also able to download these logs to use in a text editor to dig deeper into the log details. You can also refresh and search the logs for specific entries if needed. Access Logs can be helpful for understanding your site’s performance. Apache access logs contain the hits to your website that are uncached and need to be processed by the server. Nginx access logs contain all hits to your website including requests for static, cached, and uncached content.
Error Logs – Here you can find the last 24 hours of Apache and PHP error logs. You’re also able to download these logs to use in a text editor to dig deeper into the log details. If you’re monitoring a specific error or debug output you can use Refresh Logs to see the latest log(s).
Git Push – Here you can add and manage GIT developers whom have access to your install. To read further on our integration with GIT please follow along here.
Add Developer – After inputting the developer name and SSH public key selecting Add Developer will begin the 10 minute propagation period of granting the developer access to the install’s server.
Copy Key – Selecting this will copy the SSH public key for the developer into your clipboard.
Remove – This removes the developer from the install thus severing access to the install’s server
SSL – All of our plans have the ability to purchase an SSL from within our User Portal. To read further on what an SSL is you can follow along here.
Site Migration – Tools to help you migrate your site using our automated plugin, or manually migrate content using an easy checklist of steps.
Automate Your Site Migration – A plugin made to help you automatically migrate your site’s content and database to WP Engine. Just make note of the credentials, watch the short video, and download the plugin on your existing host to begin the process. Read more
Manual Migration – A tool to help you migrate your site from another host to WP Engine, quickly and easily. This follows the name of a checklist in that you’ll find six steps that you can follow along and check off as you complete them.
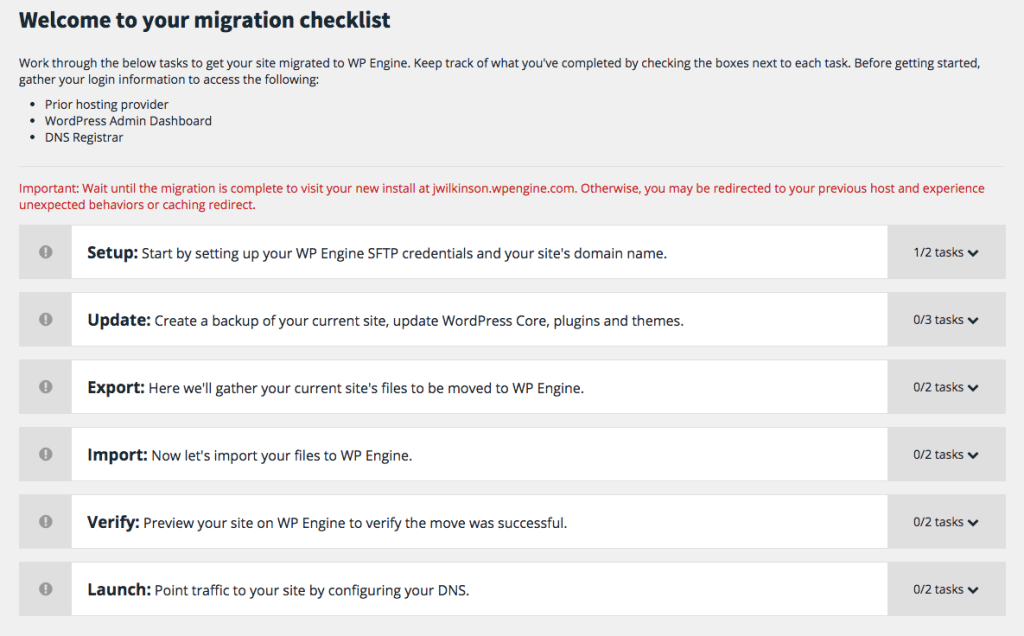 Setup – In this section, you will set up your permissions to access our server’s file system via SFTP (secure file transfer protocol). This section also allows you to link domains to your new WordPress installation.
Page Performance
This tab allows you to run Page Performance tests for speed insights on your site. It displays helpful tips for optimizing your site for the best performance possible. For more information about using Page Performance, look here.
Run Test – Enter the URL of the site or page you’d like to test using Page Performance here. You’ll receive an email notification when the test completes, so you can view the results.
Schedule Recurring Test – When viewing the test results, click the ‘View Full Test’ button to see the test details. Here, you can choose ‘Schedule Recurring’ button in order to schedule regular, automated runs of Page Performance tests.
Users
Add User – Selecting this button will allow you to add users to your install’s User Portal, giving them similar access to your install depending on the Account Access you grant them. They will receive an email containing a link to access the User Portal and designate a password after you have added them as a user.
Account Access – There are five different levels of access: Owner, Full (with billing), Full (no billing), Partial (with billing), Partial (no billing). Owner grants the ability to add and delete installs and users as well as access billing information. Full grants the ability to add installs and view all installs on an account. Partial only has access to the install(s) designated by the Owner.
Install Contacts – Choose the technical contact for each of your installs, who will receive technical notifications (such as WordPress Upgrade notices and security notices).
Delete User – This will revoke that user from being able to access your install(s).
My Account
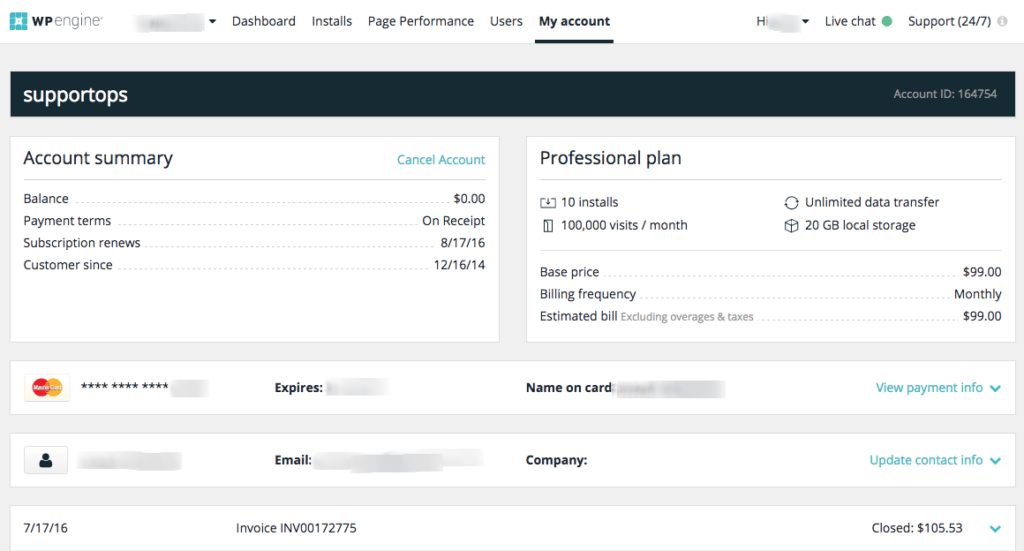
Account Summary – This section shows an overview of your account’s current balance, payments, and renewal dates.
Plan Type – This section shows the type of plan you’re on, how many installs and visits it supports, and the base price for the plan, including your estimated bill for the next billing cycle.
Payment Info – In the center you’ll see the card information on file, and have the option to update it if your payment method has changed.
Contact Info – This section shows the Billing Contact on file for the account.
Invoices – This section shows the latest invoices for the account, where you can click each invoice to view the line-item breakdown of charges/credits.
Reading the Invoice – For users with Billing access they can view each invoice and view all charges and who was billed.
Upgrade Plan – To unlock additional features and usage limits you can easily upgrade your plan from within the My Account tab. Selecting this button you’ll be able to view all of our current plan offerings and be able to upgrade from within the User Portal.
24/7 Live Chat
Support
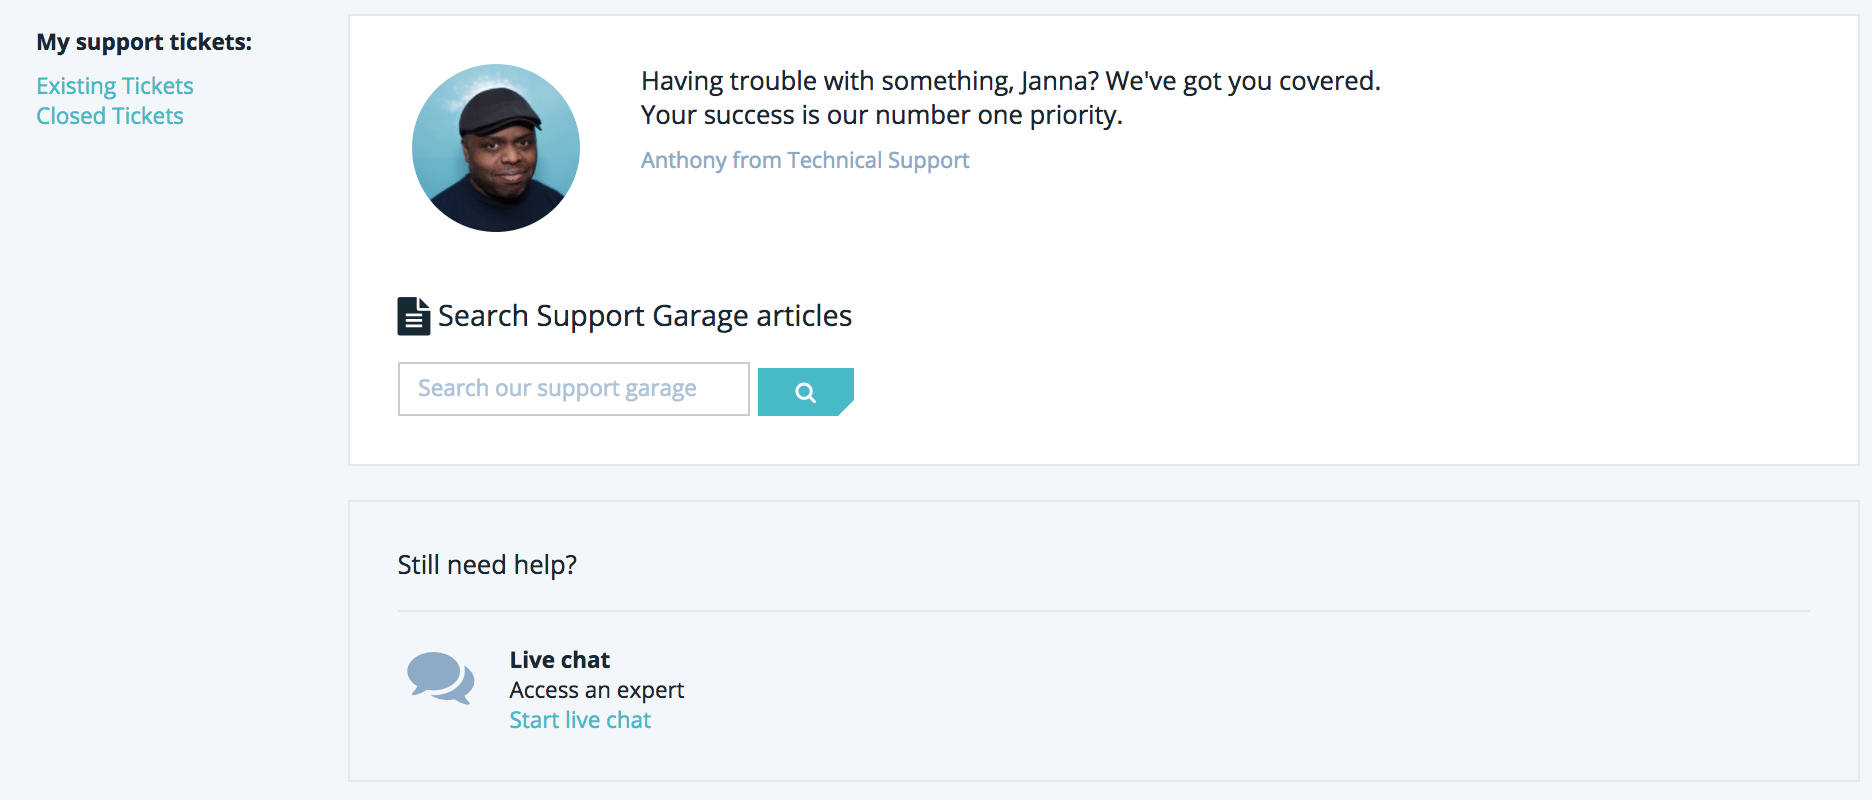
Search Support Garage – This will help you search popular and effective Support Garage articles that our customers utilize.
Live Chat – Just like the Chat button at the top of the User Portal you’ll be able to gain access to our Live Chat team 24/7
