![]()
Please note: The content in this article is intended for users on Startup, Growth, and Scale plans. If you are on a Personal, Professional, or Business plan, follow these steps instead.
On the WP Engine Digital Experience Platform, developers can create a working website for a client using a transferable environment, and, when complete, send the environment over to their client. In this article we will explain how to create a transferable environment, and how to then transfer that environment to your client successfully.
About transferable environments and sites
Transferable sites can have up to three environments within them. They differ from standard sites in a few ways:
- Transferable sites do not count against your plan limits.
- Environments within transferable sites are automatically password-protected to block traffic, and passwords cannot be removed until the transfer is complete.
- They are automatically exempt from cache due to password-protection.
- They are ineligible for mapping custom domains, using SSL, and using CDN.
- They are transferable to another WP Engine account.
Creating a transferable environment
The first step is to create a transferable environment from which to work. These environments are automatically password protected, and are unable to have custom domains added as they are development workspaces.
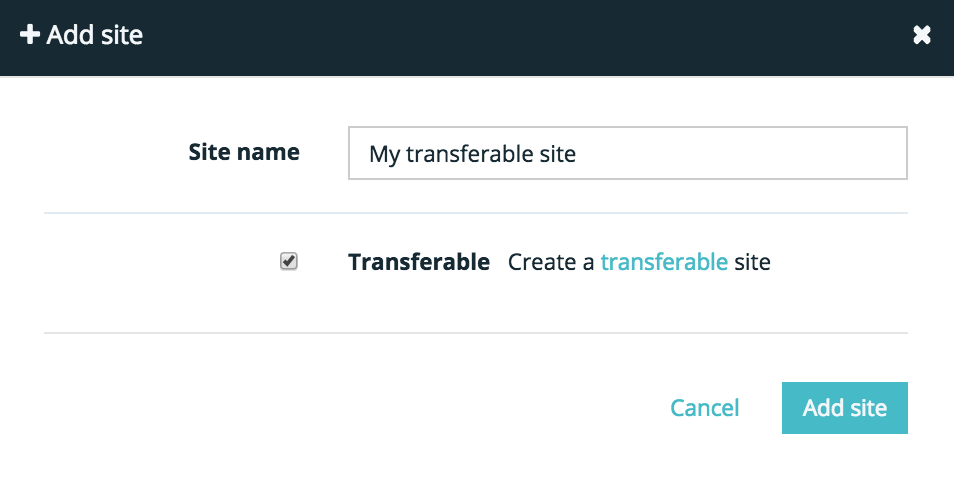
- First, click Add site from the sites tab in your User Portal.
- In the Add site pane, enter your desired site name, and select the Transferable checkbox before clicking Add site.
- Create a brand new environment to work from, or copy an environment from another one.
- Once your environment is created, you will see a banner indicating this is a “transferable environment (Restricted)” which indicates the environment is using Password Protection.
Transferring a Transferable Environment
Once you have created the website within the transferable environment to your client’s satisfaction, you may transfer the environment to them. To transfer the environment to your client’s account, you can use the following steps:
- Navigate to Sites > your transferable site > your transferable environment from your User Portal
- Select Transfer this environment from the Transferable environment pane on the Overview page.

- Enter the email address of the client to whom you wish to transfer, and a custom message if needed.
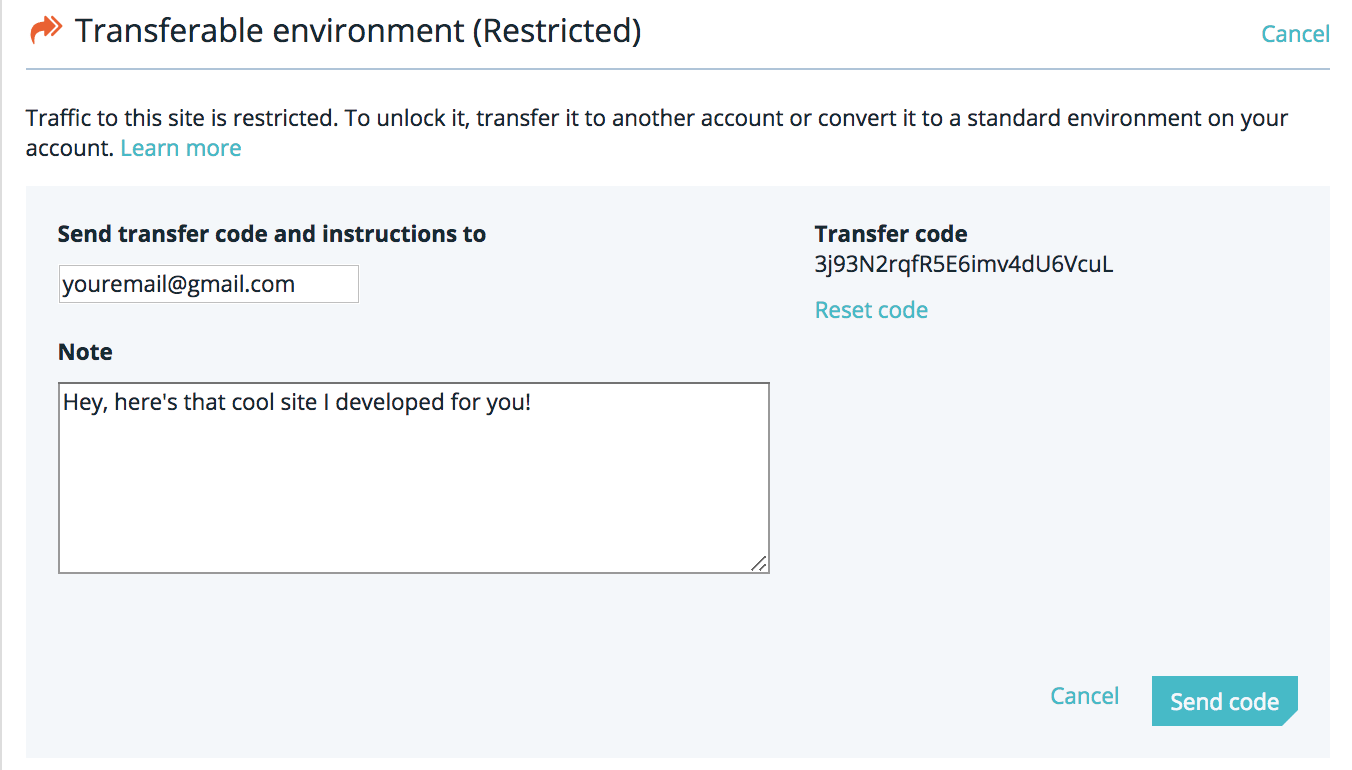
- The client will receive an email with instructions for how to accept the transfer, as well as your custom message if you added one.
Unlocking a Transferable Site
If you later decide to keep a transferable site on your own account (and do not want to transfer it to another account), you may do this from the Sites page in your User Portal.
- Click the “…” menu to the right of your transferable site.

- Click Unlock site and confirm you want to unlock in the modal–you cannot undo this action.
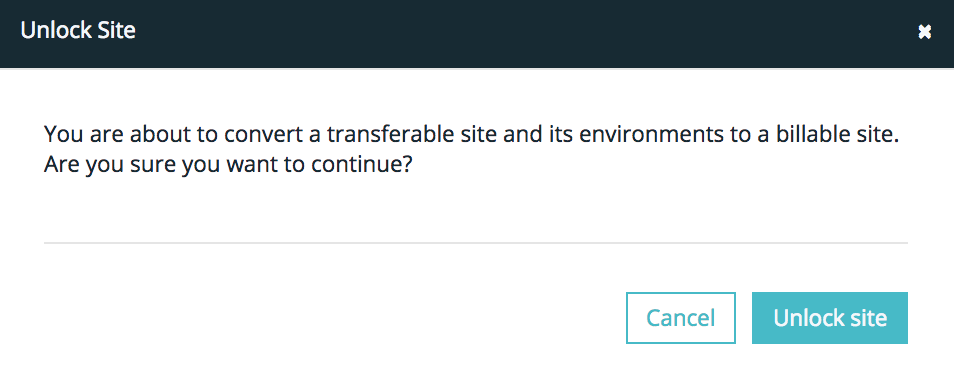
- Your site will now count against your site limits. You may now map a custom domain to your production environment in this site.