
LargeFS is a product created by WP Engine, designed to store and transfer virtually unlimited amounts of data and integrate it into the familiar WordPress experience.
For more information on what LargeFS is, read our announcement post, Unlimited Storage with WP Engine’s Proprietary LargeFS.
To configure LargeFS, here is a summary of what you will need to do:
- Create an AWS S3 Bucket
- Give WP Engine access to read, write, and list objects in that bucket
- Make the bucket world readable as a static website.
- Provide bucket name and region to WP Engine by submitting support request
Detailed instruction on each step are below.
Creating a Bucket
To create a bucket, login to your AWS console and choose S3 from the list of services. Once in the S3 console, click the Create Bucket button:
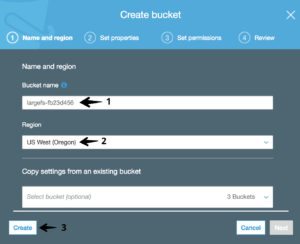
Give the bucket a name, that meets the following criteria:
- The name must be globally unique. Amazon does not allow bucket names to be reused; not even in different accounts.
- The bucket must start with a letter and contain only letters (lowercase only), numbers, and hyphens.
For this example, we chose largefs-fb23d456, but you will need to choose your own. Select a region you want to host your bucket in. Be sure to remember the region as you will need to provide this later to WP Engine Support. Now click “Create”.
Assigning Permissions to LargeFS
Next we need to assign the required permissions to the bucket, so that LargeFS can begin placing files in the bucket.
Find and select the bucket you just created in the list of buckets. Next, click “Permissions” to reveal the permissions page. Now click “Bucket Policy”. In the bucket policy editor, copy the policy below, which grants the WP Engine LargeFS user rights to read and write objects in your bucket, and replace the placeholder “your-bucket-name” with the bucket you created. Be sure to keep the “/*” while replacing the placeholder.
{
 "Version": "2008-10-17",
 "Statement": [
 {
 "Sid": "AllowLargeFSUploads",
 "Effect": "Allow",
 "Principal": {
 "AWS": "arn:aws:iam::902500896138:user/wpengine-largefs"
 },
 "Action": [
 "s3:ListBucket",
 "s3:GetObject",
 "s3:PutObject"
 ],
 "Resource": [
 "arn:aws:s3:::your-bucket-name",
 "arn:aws:s3:::your-bucket-name/*"
 ]
 },
 {
 "Sid":"PublicReadGetObject",
 "Effect":"Allow",
 "Principal": "*",
 "Action":["s3:GetObject"],
 "Resource":[
 "arn:aws:s3:::your-bucket-name/*"
 ]
 }
 ]
 }
Once you have replaced the placeholders with your bucket name, click “Save” in the Policy Editor.

Enabling Static Website Hosting
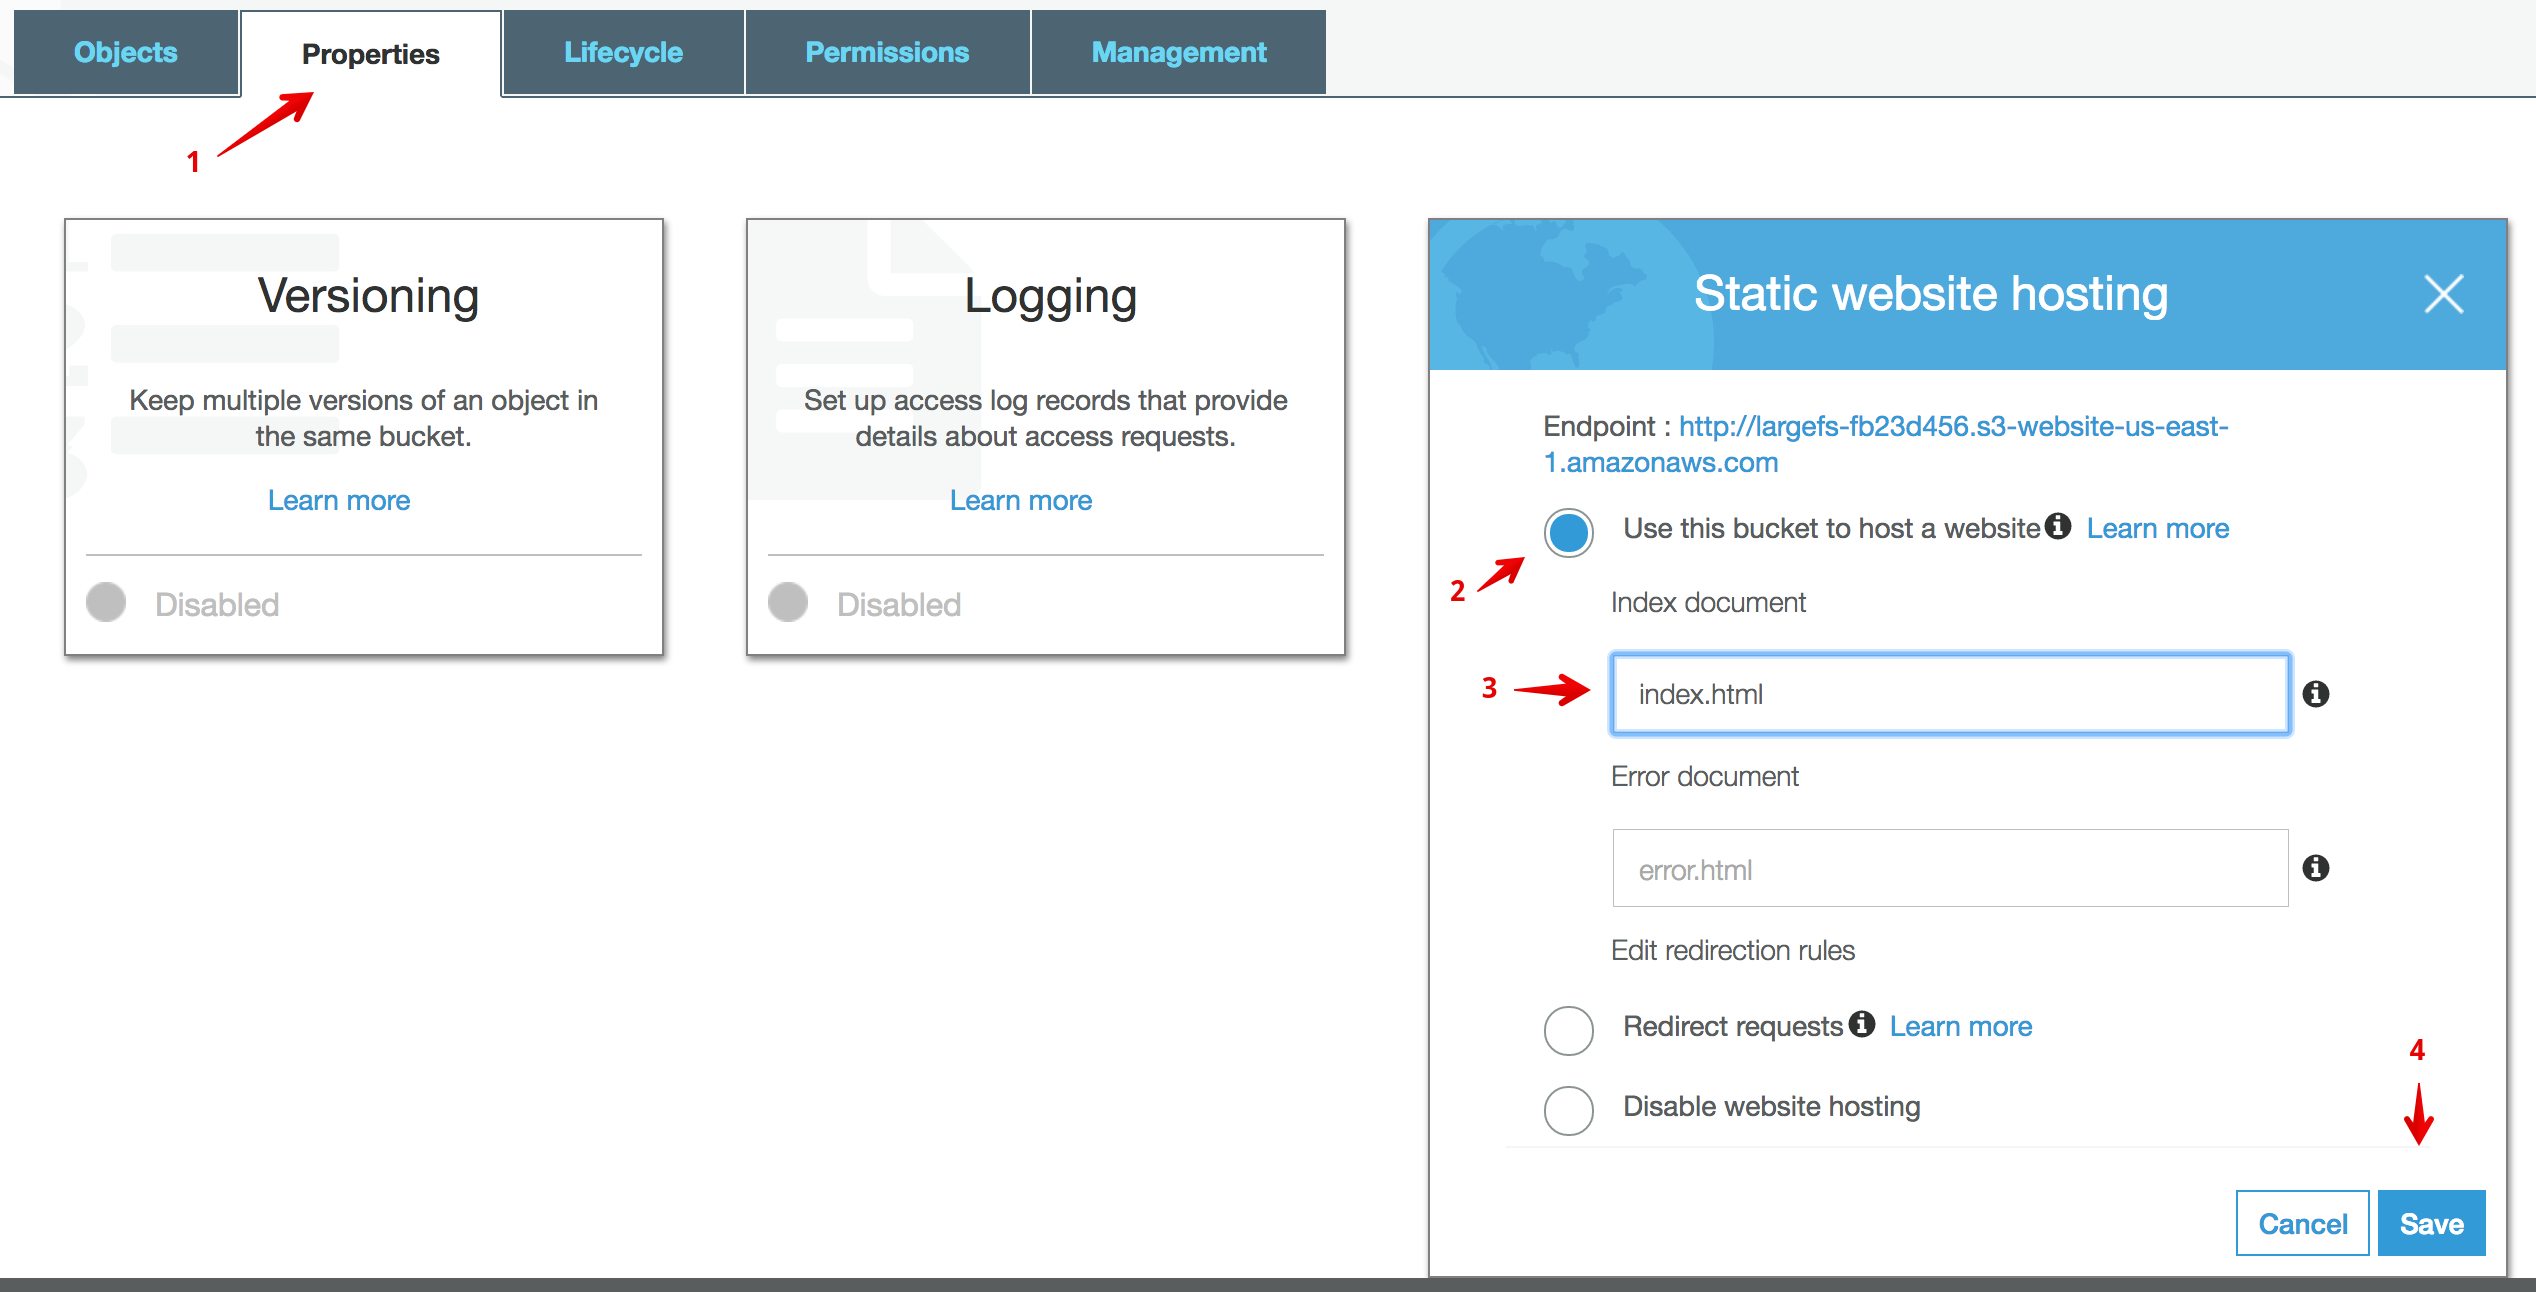
Finally, we need to enable the bucket for static website hosting.
Click “Properties” in the top menu. Now, click “Static Website Hosting”, click “Use this bucket to host a website“, specify “index.html” for the Index Document and click “Save”.
Sometimes it takes some time for AWS permissions to propagate, so it may take some time before LargeFS can begin uploading content.
Note: The policy and settings above makes your bucket world-readable. This is because when WP Engine goes to retrieve your files from the bucket, it does this as if it was a user on the internet. Because of this, it is important that you do not store any non-public files in the bucket. Best practice is to not store any files in the bucket that are not managed by LargeFS.
Provide Your Bucket Details to WP Engine
All that is left is to provide the bucket details to WP Engine. You can do this by opening a 24/7 Live Chat in your User Portal that includes your bucket name and bucket region. The Support technician will then walk you through the process of validating your S3 bucket with our system.
Once this process is completed, we will start copying over files from your local wp-content/uploads to your new Amazon S3 bucket. Going forward, we will continue to copy over new files (at least 10 days old) over to S3 on a daily basis.
Known Limitations
When using LargeFS, you are storing your website images in a separate service via Amazon S3. Some plugins and themes hardcode server paths when looking for images, which may cause conflicts with this service. Below are some known limitations and incompatibilities with LargeFS.
Image Resizing Tools
TimThumb and other PHP-based dynamic image resizing tools. These systems use a PHP script to manually resize images as they are requested, requiring the images to be on the server itself. As a result, these dynamic resizing tools will not work with LargeFS. However, WordPress has image resizing built in natively now via srcset, so these additional tools should no longer be needed. The built-in image resizing in WordPress works normally with LargeFS.
Image Compression Tools
WP Smush, EWWW Image Optimizer Cloud, and other image compression tools typically attempt to compress images when they are uploaded. Our LargeFS system waits 10 days after uploading the files to send them to your S3 bucket, so in most cases there are no conflicts. However, if you ever change thumbnail sizes or need to regenerate thumbnails, this could require moving your images back down from your S3 bucket to your server. You can use the steps in our Moving Buckets guide to assist in copying files to your local machine and then uploading them via SFTP.
Hard Server Paths
If you are using a plugin or theme which references images as a path on the server rather than a URL, this may also conflict with LargeFS. An image referenced as a server path might look like: /nas/content/live/environment_name/wp-content/uploads/myimage.png, rather than mydomain.com/wp-content/uploads/myimage.png. If that is the case, your images stored in LargeFS may not appear properly. Remember, LargeFS sends your images to your Amazon S3 bucket, so they do not live on a hard server path to be referenced in this way. However, calling the images as a URL path will work normally with LargeFS.
Note: If you use Gravity Forms for uploads, please let our Support team know the Gravity Forms folder will need to be excluded from LargeFS. Because uploads in Gravity Forms use a hardcoded server path, these are required to load from the server directly.
Network Out Bandwidth
When configuring your Amazon S3 bucket, you agree to some terms and conditions with Amazon. One of these terms is accepting terms of payment for Network Out bandwidth usage for your bucket. Another is the storage usage with Amazon. Be sure to inspect the terms and conditions for your agreement with Amazon closely, to ensure you understand all charges.